Using the OKD4 web console (https://webeos.cern.ch)
Creating a webEOS site
You can create a webEOS site from the OKD4 web console by following a few simple steps.
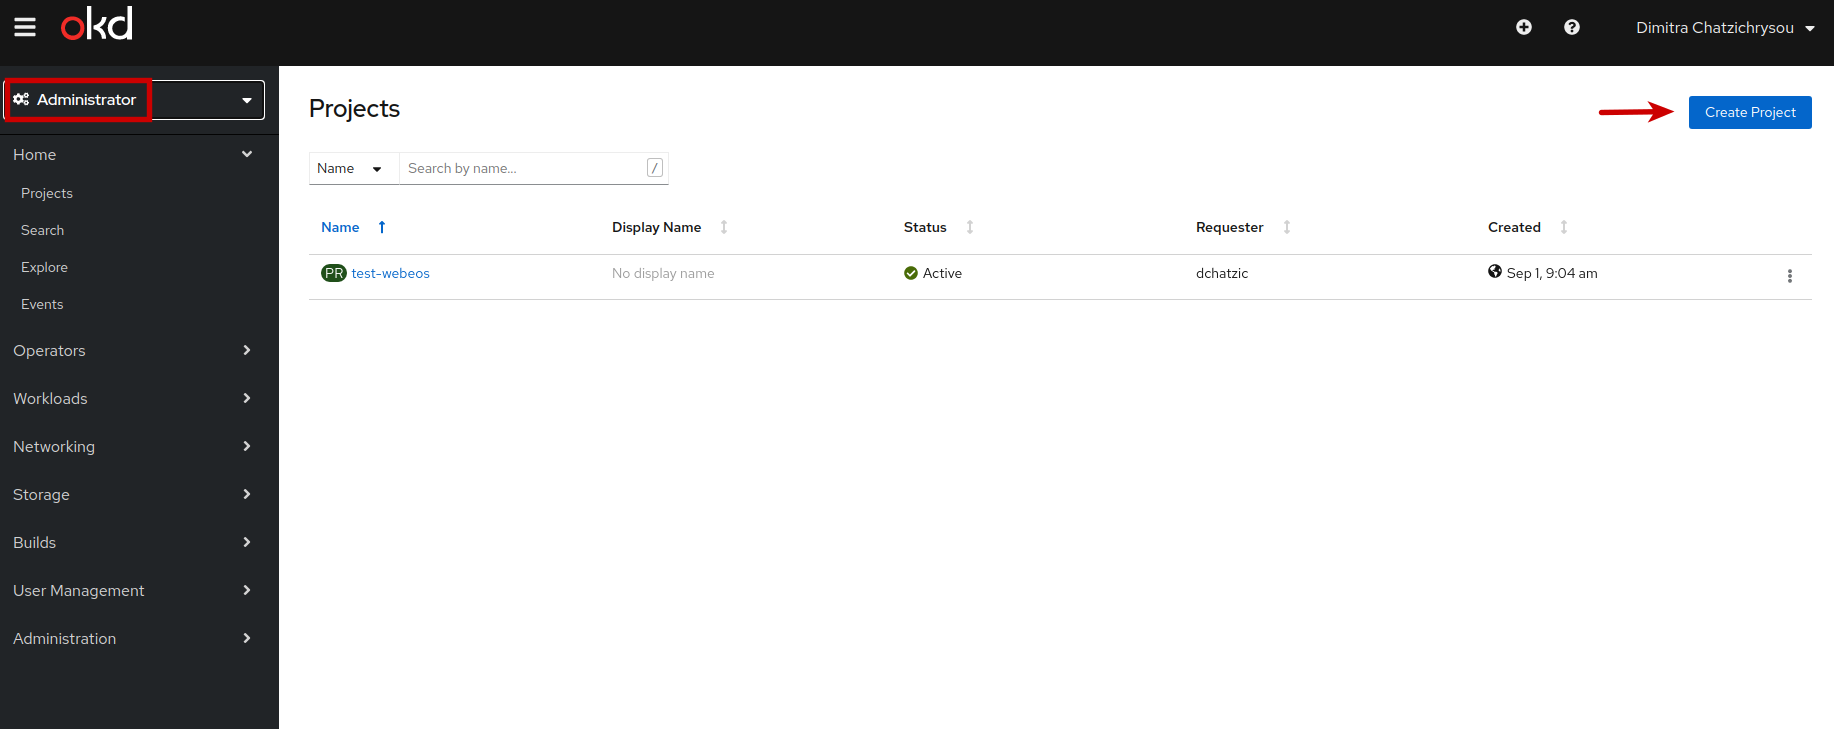
1. Go to the OpenShift console page
Check on the left side menu that the Administrator option is selected (and not Developer).
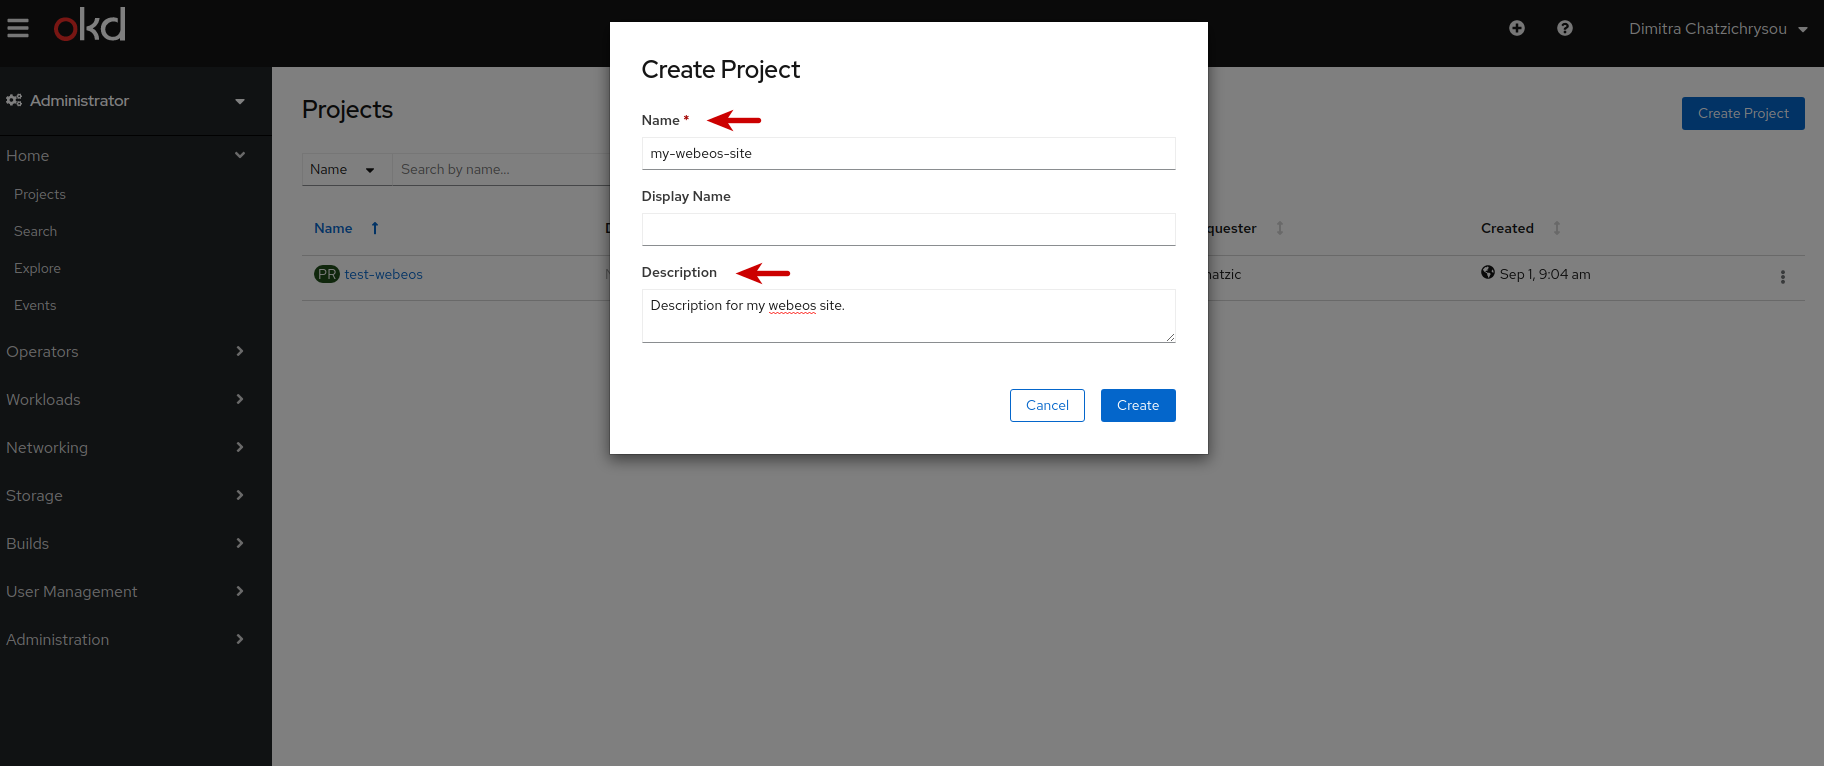
2. Create a new OpenShift project by clicking Create Project and fill in the information
- Name: Enter the name of your project. This field is mandatory.
- Display Name: Enter the display name of the project.
- Description: Enter a description of your site. This field is mandatory.
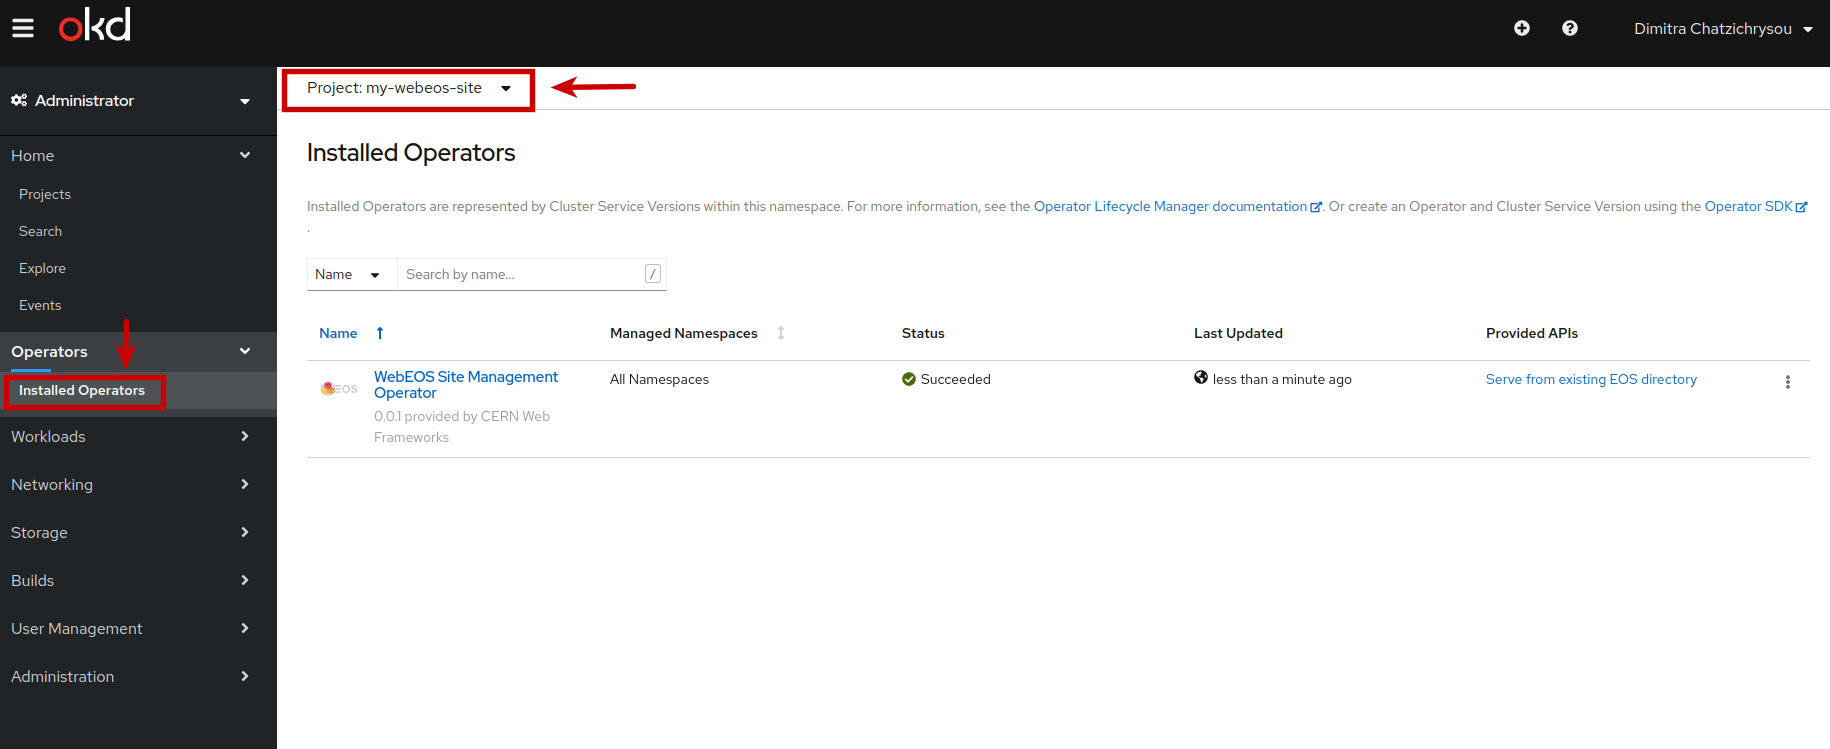
3. Click on Installed Operators on the left side menu
Make sure that you are in the correct Project. At first you will see a message "No Operators Found". Please wait a couple of minutes until the "WebEOS Site Management Operator" appears as shown in the screenshot below.
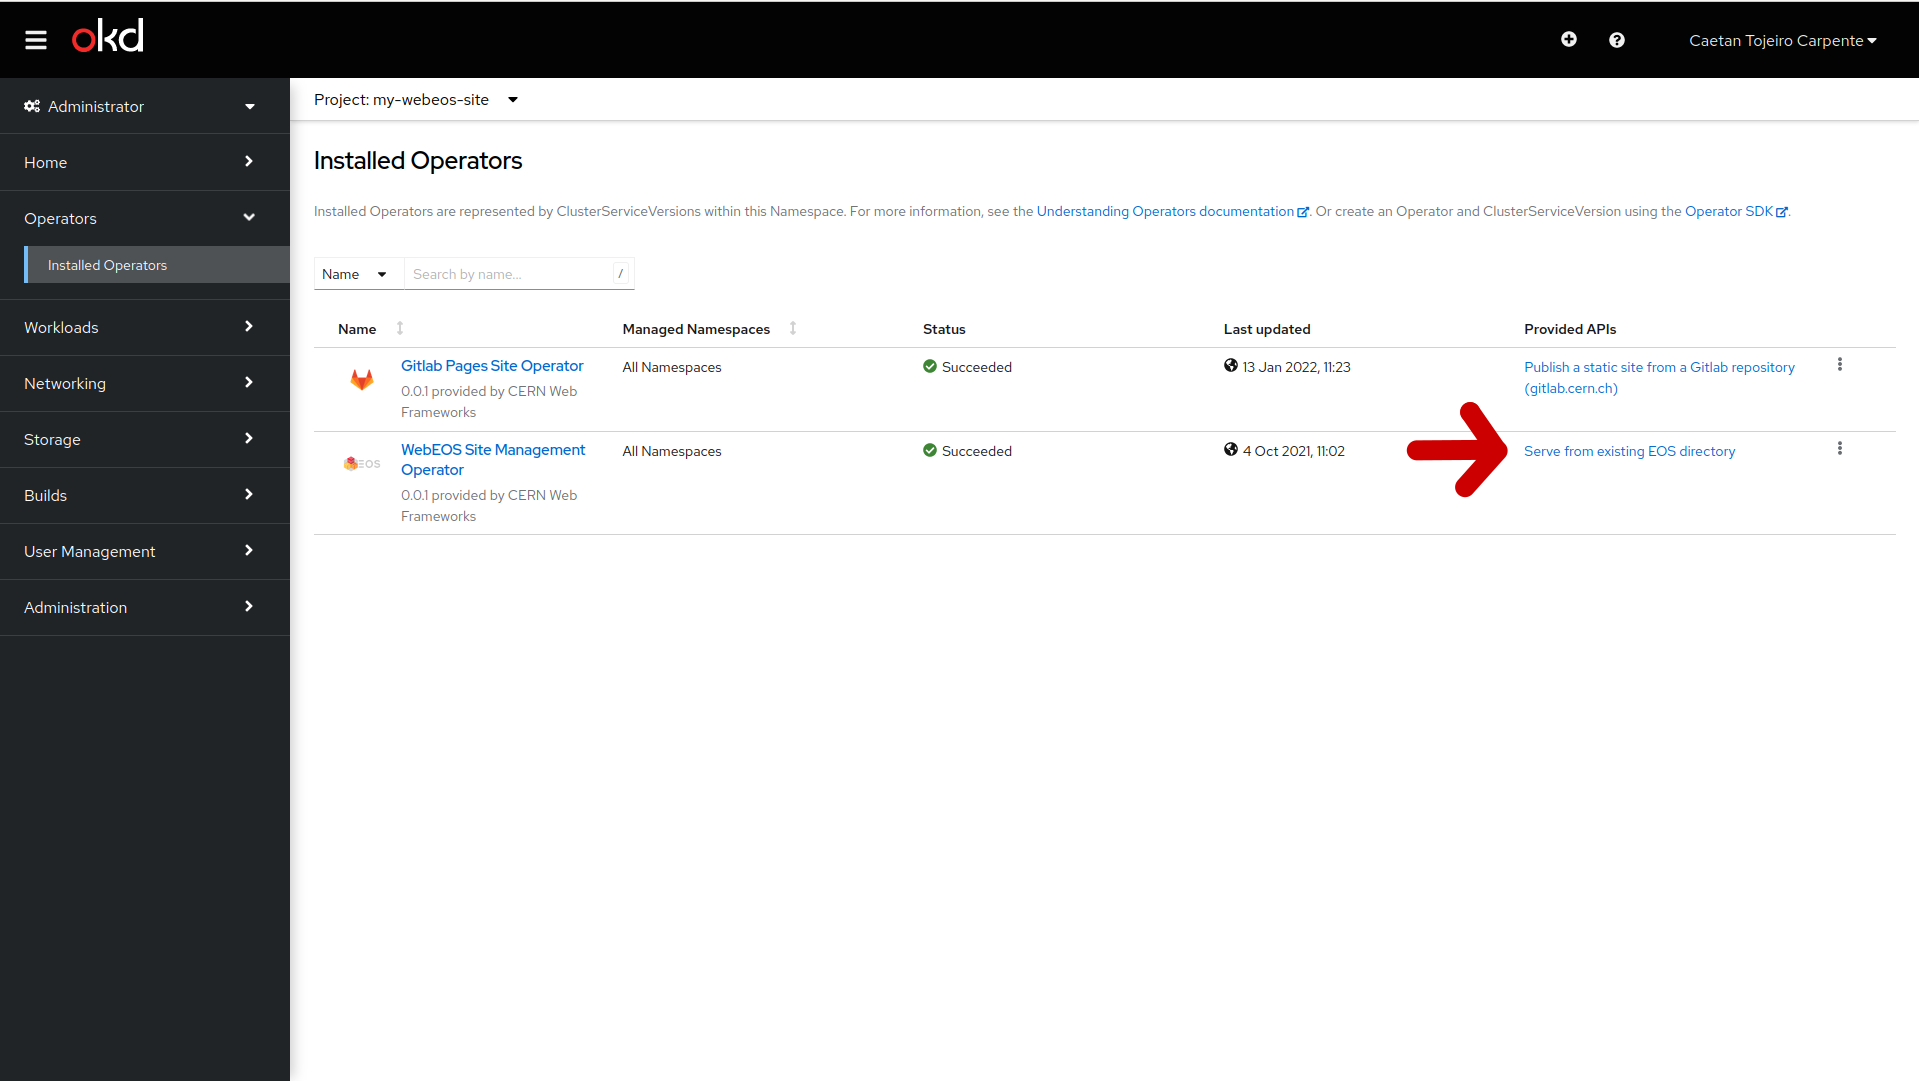
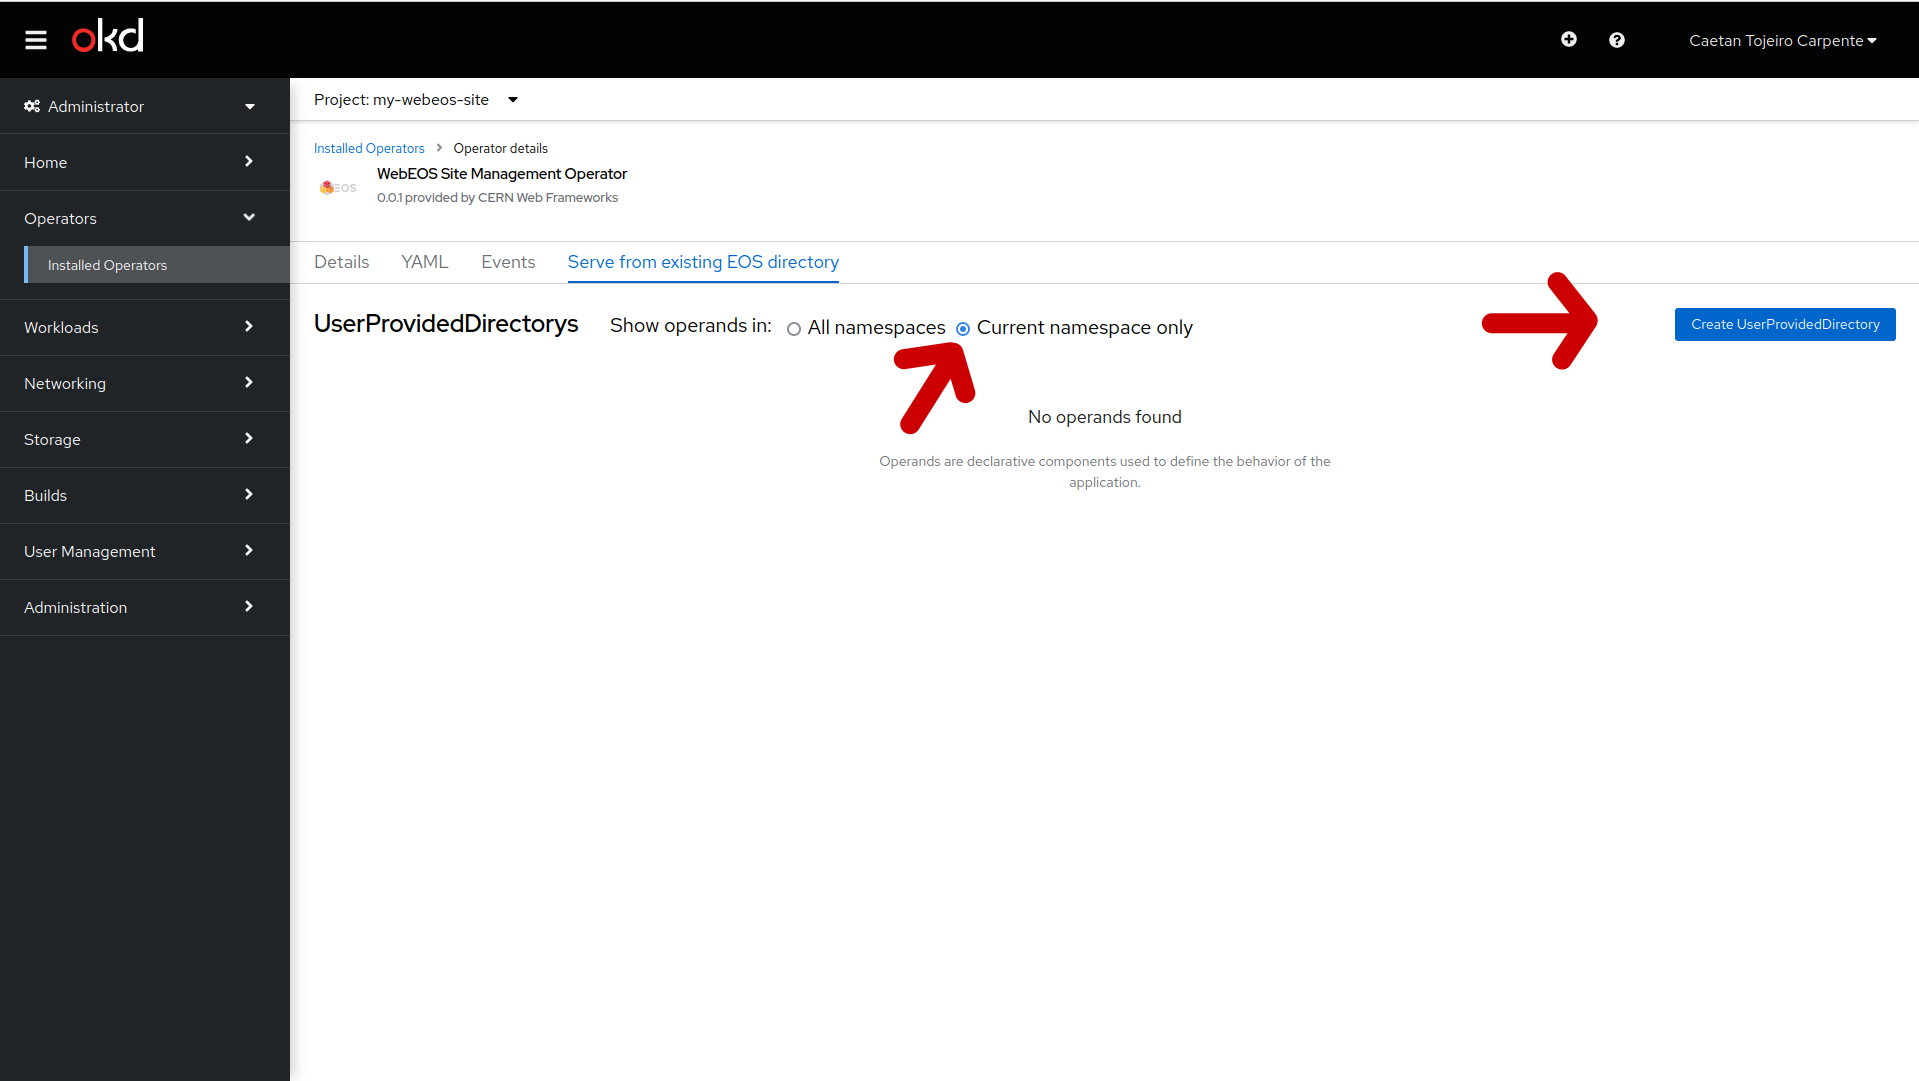
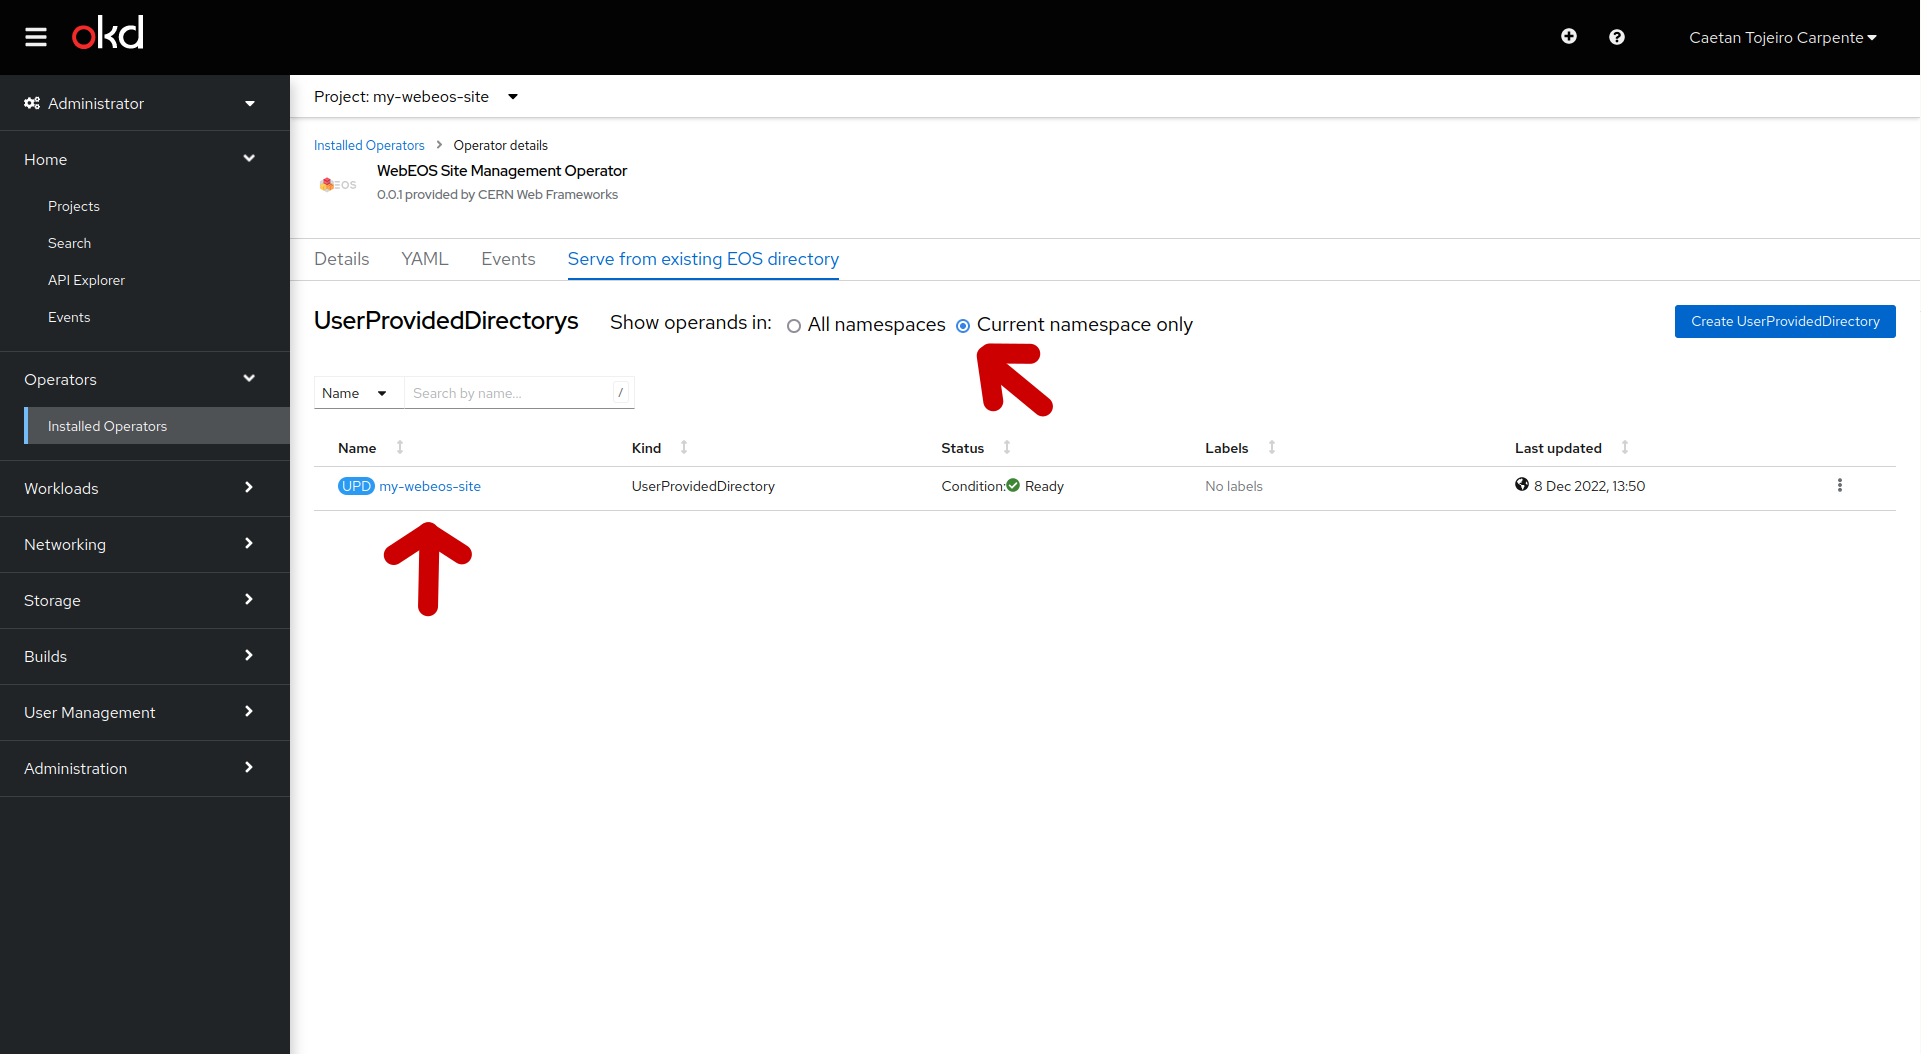
4. Click on Serve from existing EOS directory
5. Click on Create UserProvidedDirectory
Select Current namespace only radio button
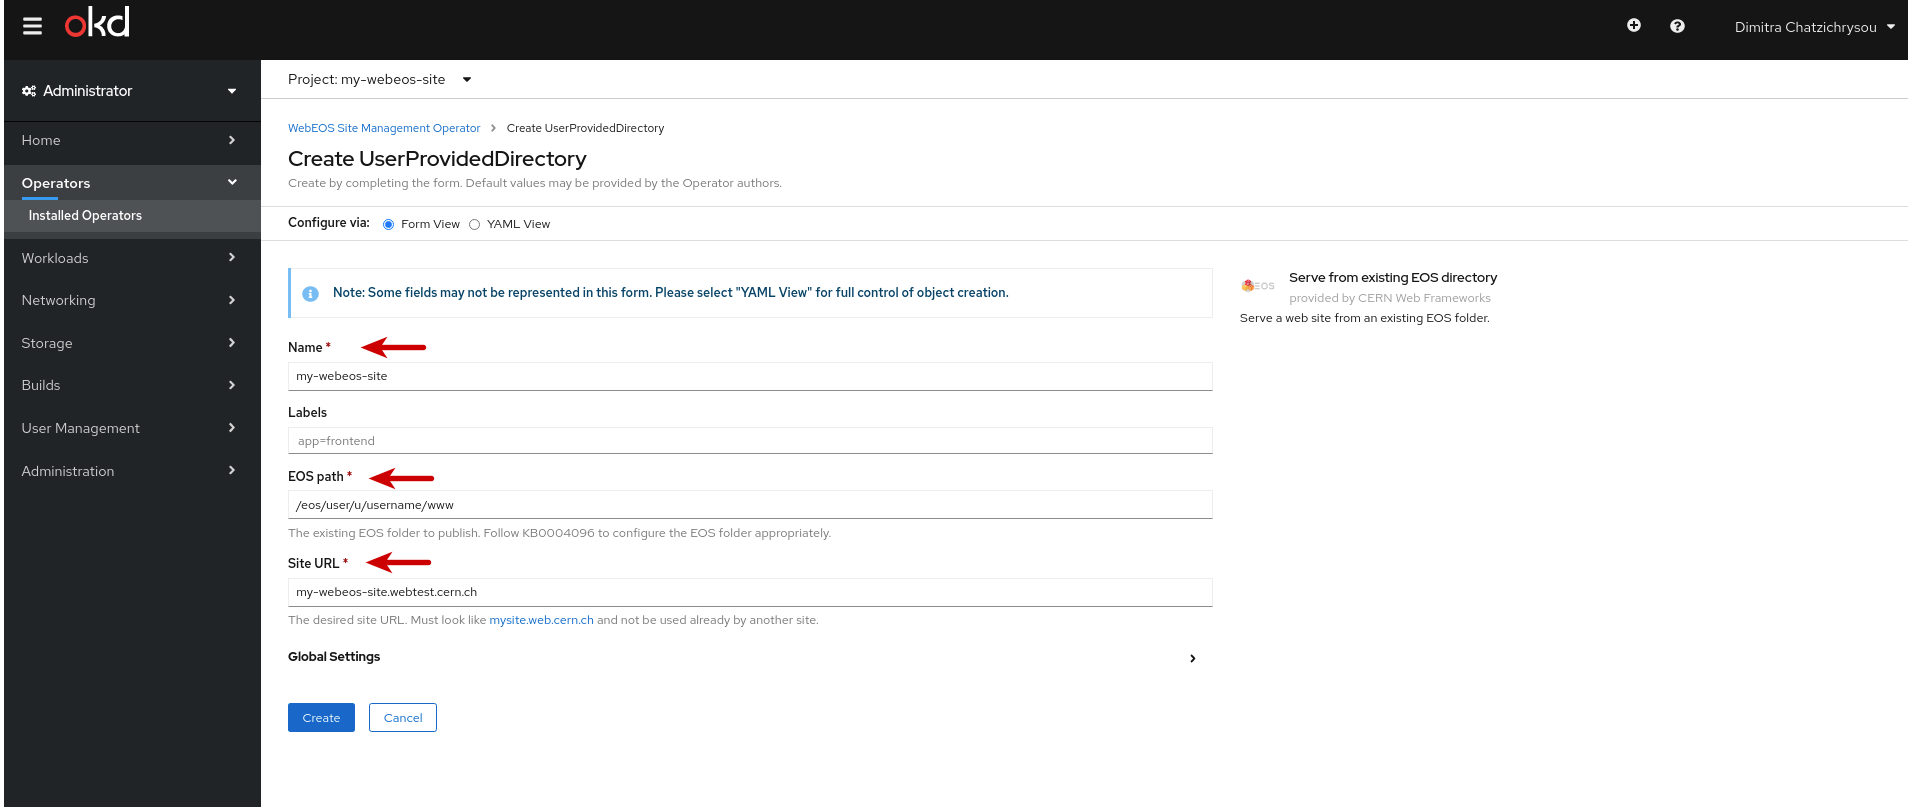
6. Fill in the information to create a UserProvidedDirectory
- Name: Enter the name of the site.
- Labels: Ignore this field.
- EOS path: Enter the existing EOS folder to publish. Follow KB0004096 to configure the EOS folder appropriately.
- Site URL: Enter the desired site URL. Must look like mysite.web.cern.ch and not be used already by another site.
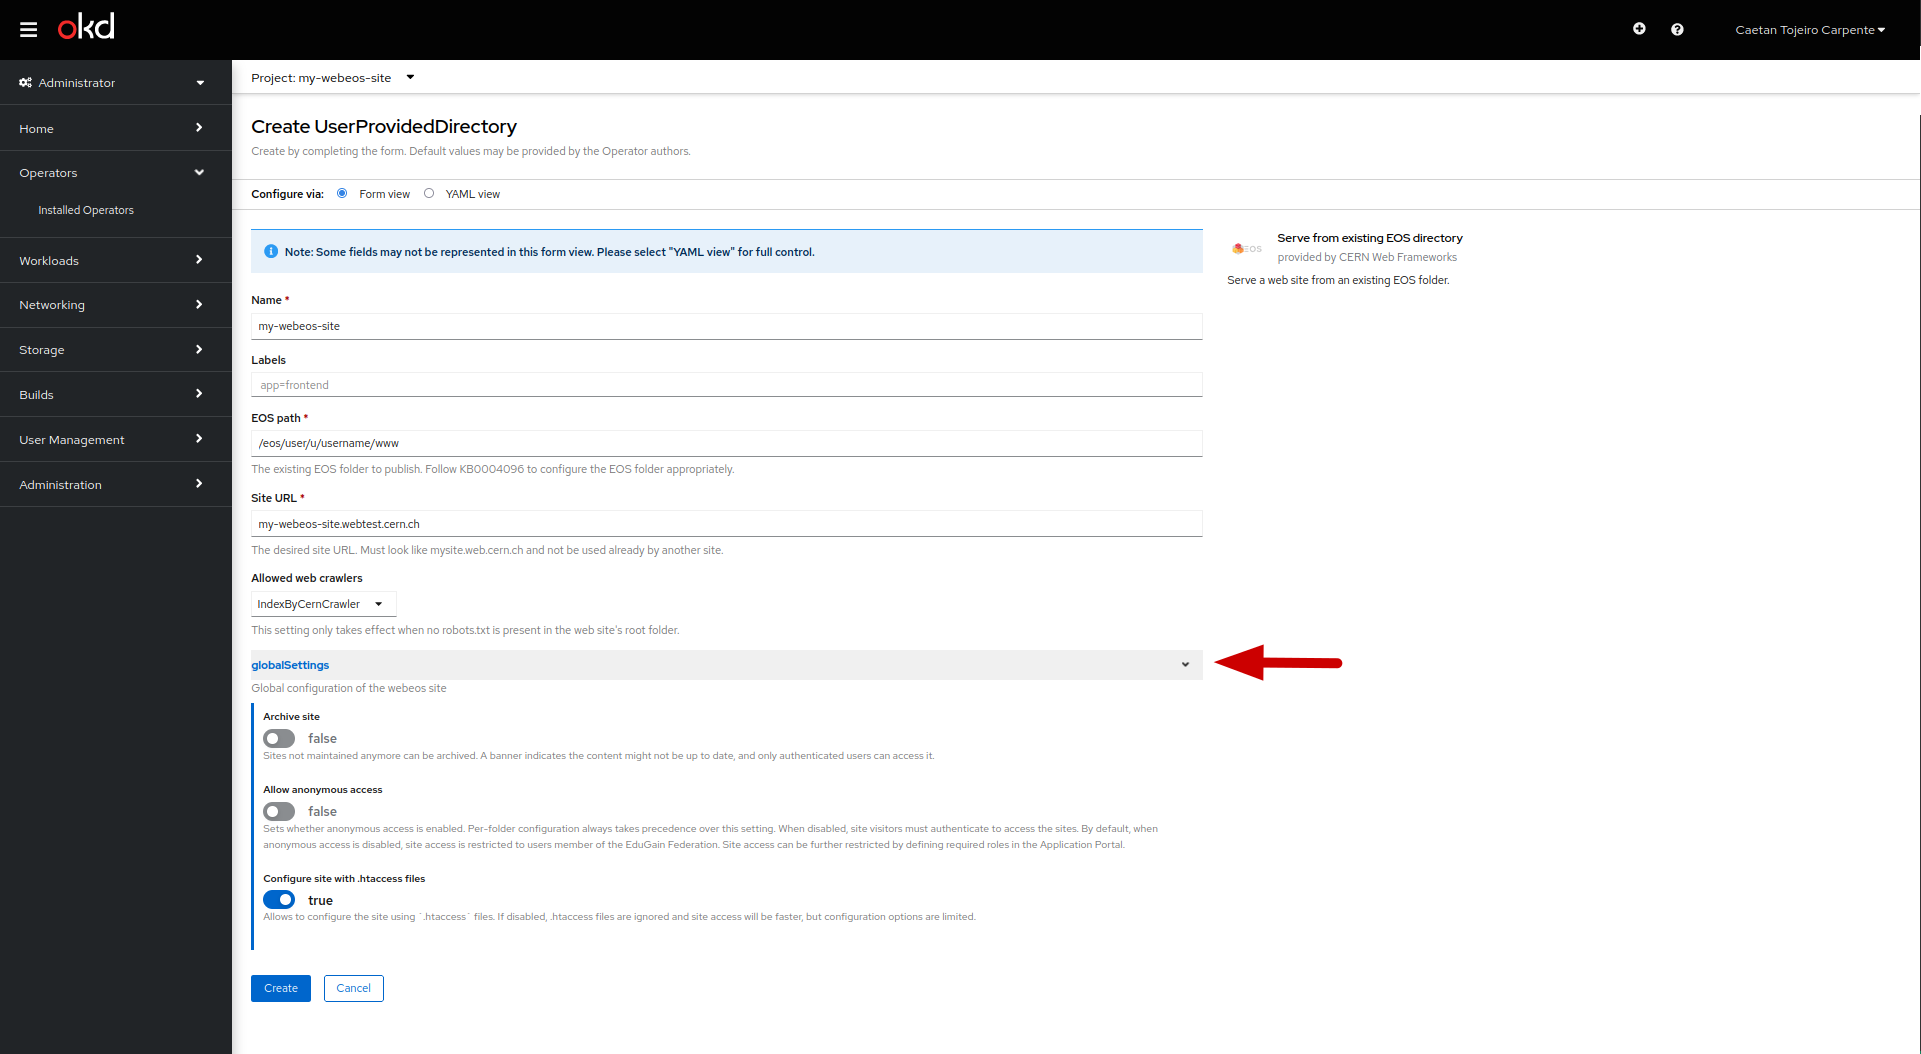
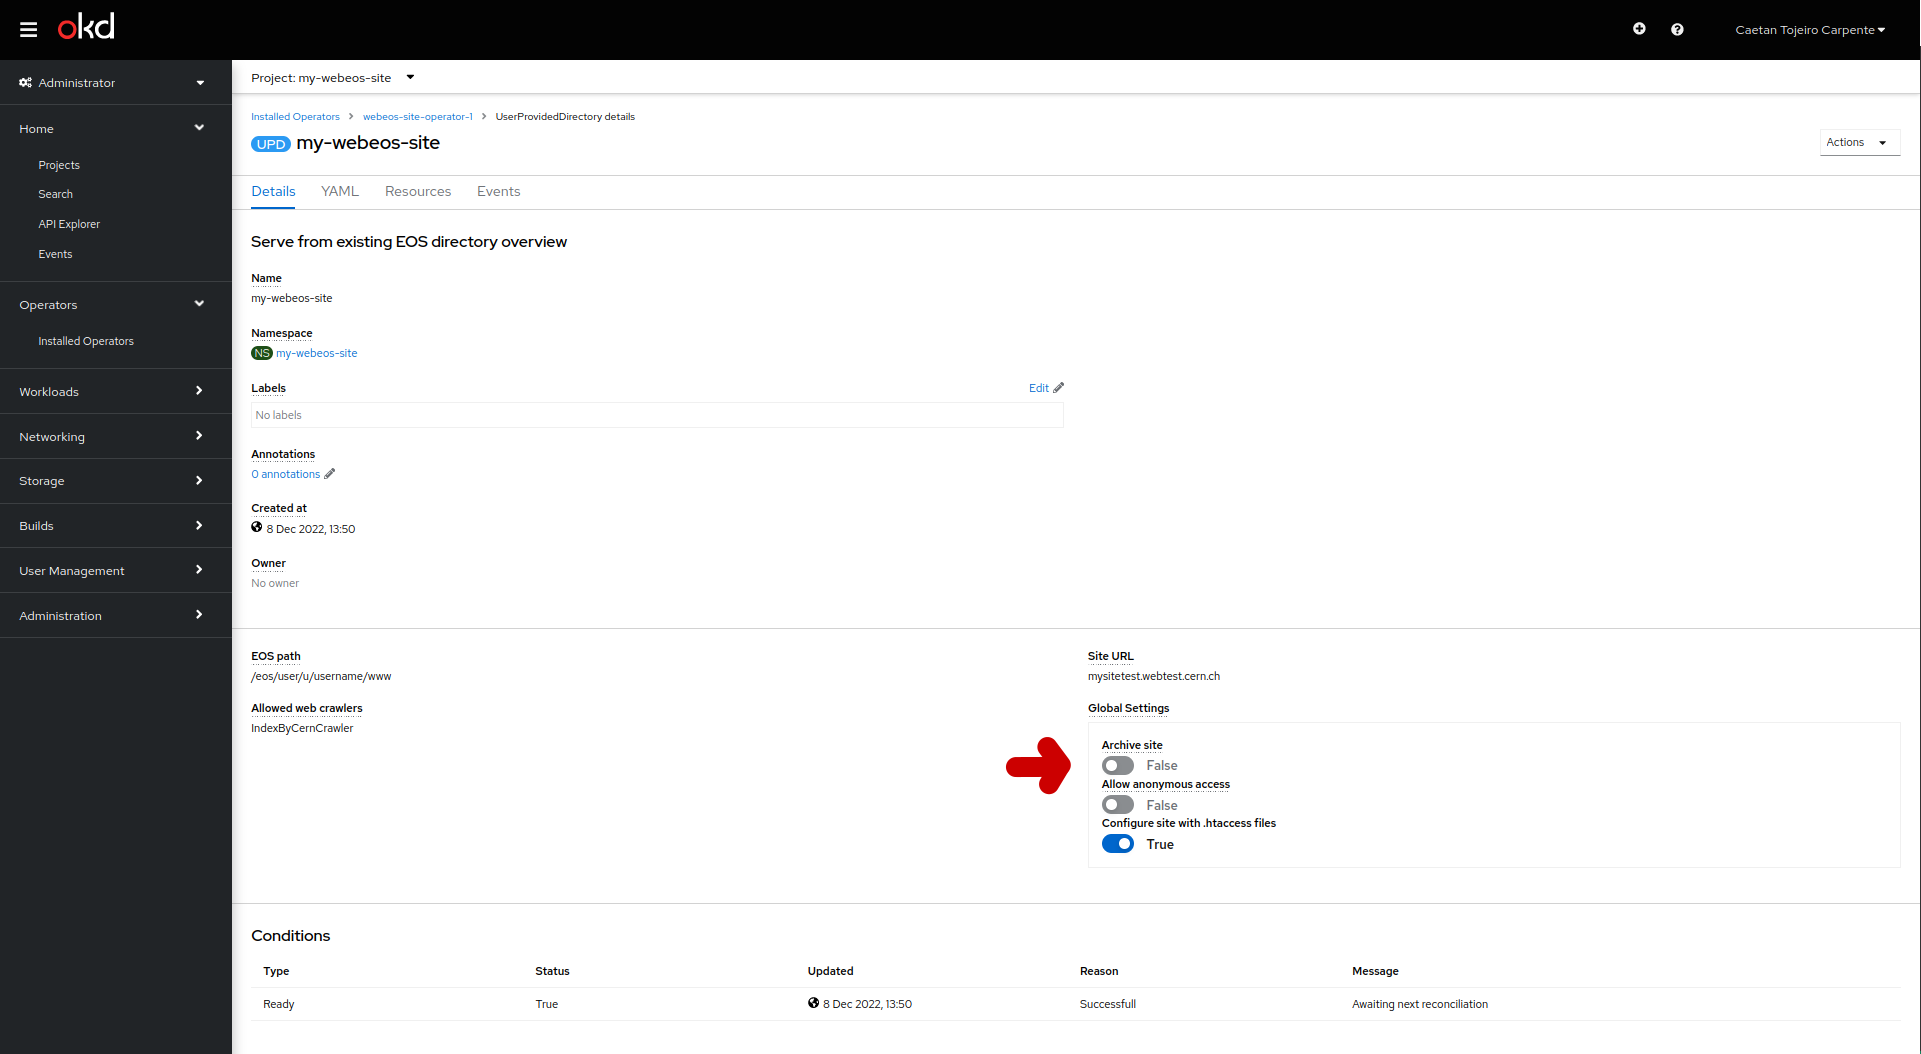
7. Click on Global Settings to expand the options panel with the default settings
- Allow anonymous access by default: Sets whether anonymous access is enabled. Per-folder configuration always takes precedence over this setting. When disabled, site visitors must authenticate to access the sites. By default, when anonymous access is disabled, site access is restricted to users being members of the EduGain Federation. Site access can be further restricted by defining required roles in the Application Portal.
- Archive site: Sites not maintained anymore can be archived. A banner indicates the content might not be up to date, and only authenticated users can access it.
- Configure site with .htaccess files: Allows to configure the site using
.htaccessfiles. If disabled, .htaccess files are ignored and site access will be faster, but configuration options are limited.
Follow the Setting up authorization guide for more details on how to define the authorization to your site.
8. Click on Create button
Your webEOS site is ready.
Keep in mind that related sites can be grouped under a single project starting from Step 3.
Managing a webEOS site
A webEOS site is connected with an OpenShift project and an EOS directory (called UserProvidedDirectory) that serves the content.
Depending on the type of modification that you want to make, you will need to edit one of the following:
- Application Portal's site registration in order to change:
- the owner of the site
- the administrator group of the site (a.k.a. site moderator group)
- the description of the site
- the category of the site
- OpenShift's project YAML in order to change:
- the display name
- UserProvidedDirectory Details in order to:
- let the users know that the site has been archived
- set up authorization
- UserProvidedDirectory's YAML in order to change:
- the EOS path
- the site URL
- between the legacy and new URL
- .htaccess files in order to:
- set up authorization
- enable cgi execution
- enable directory browsing
- enable CERN Intranet access restriction
- set up rewrite rules or use any other Apache directives
- enforce HTTPS
Editing site registration in the Application Portal
Each webEOS site is registered in the CERN Application Portal. From there you can consult the list of sites which you own or moderate.
Identify the site for which you want to perform changes (look for the identifier webframeworks-webeos-<siteName>) and click on the green Edit button. You will be able to update site's category and description, as well as its owner and administrator group. The changes made in the Application Portal are automatically applied to the site's configuration in OKD4, typically within a couple of minutes.
Editing the OpenShift project's YAML
1. Go to the OpenShift console page
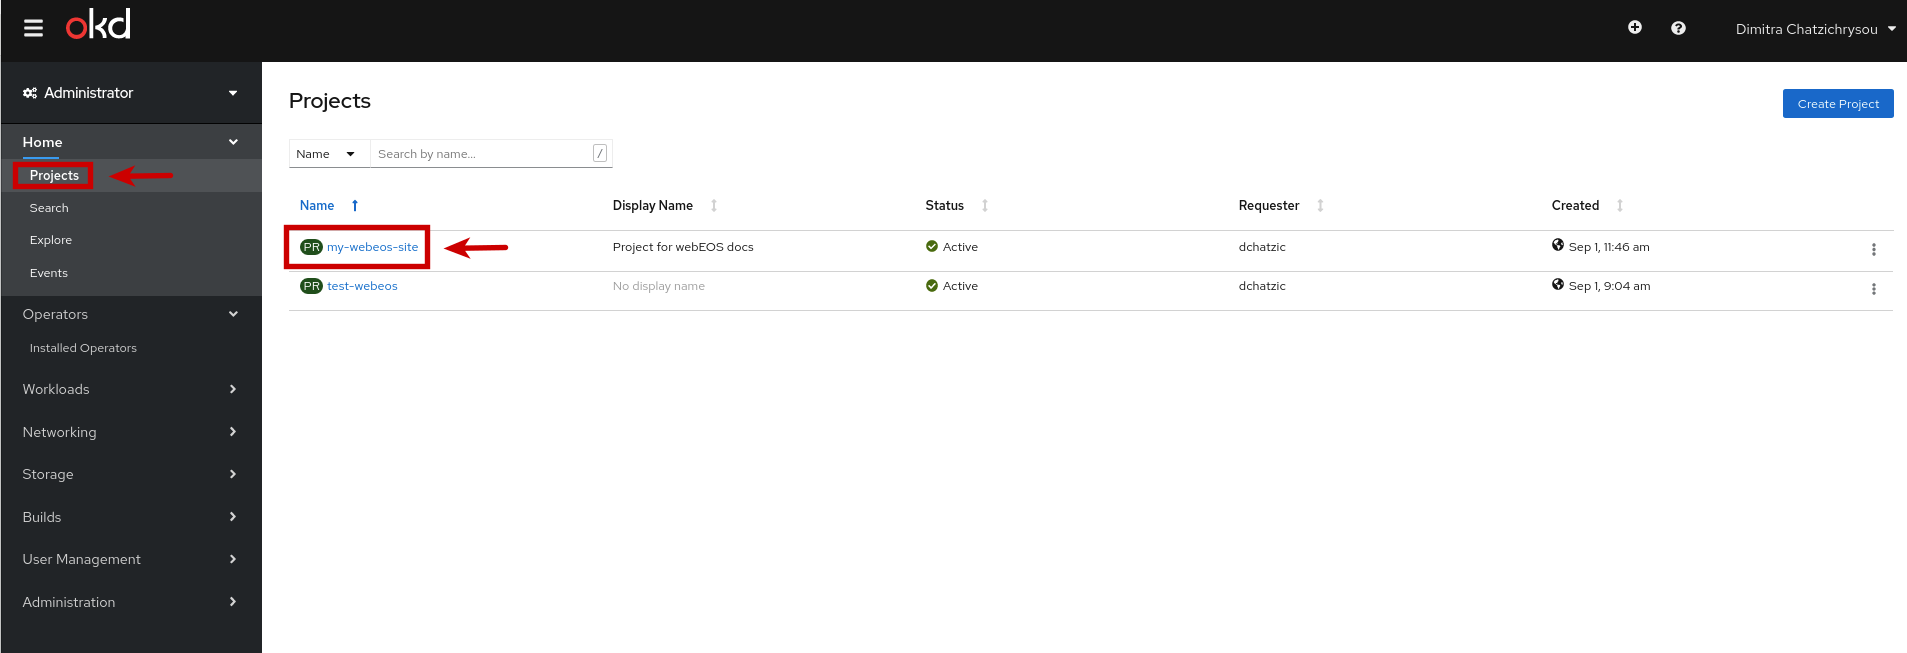
2. Click on Projects on the left side menu
Choose the project that you want to update.
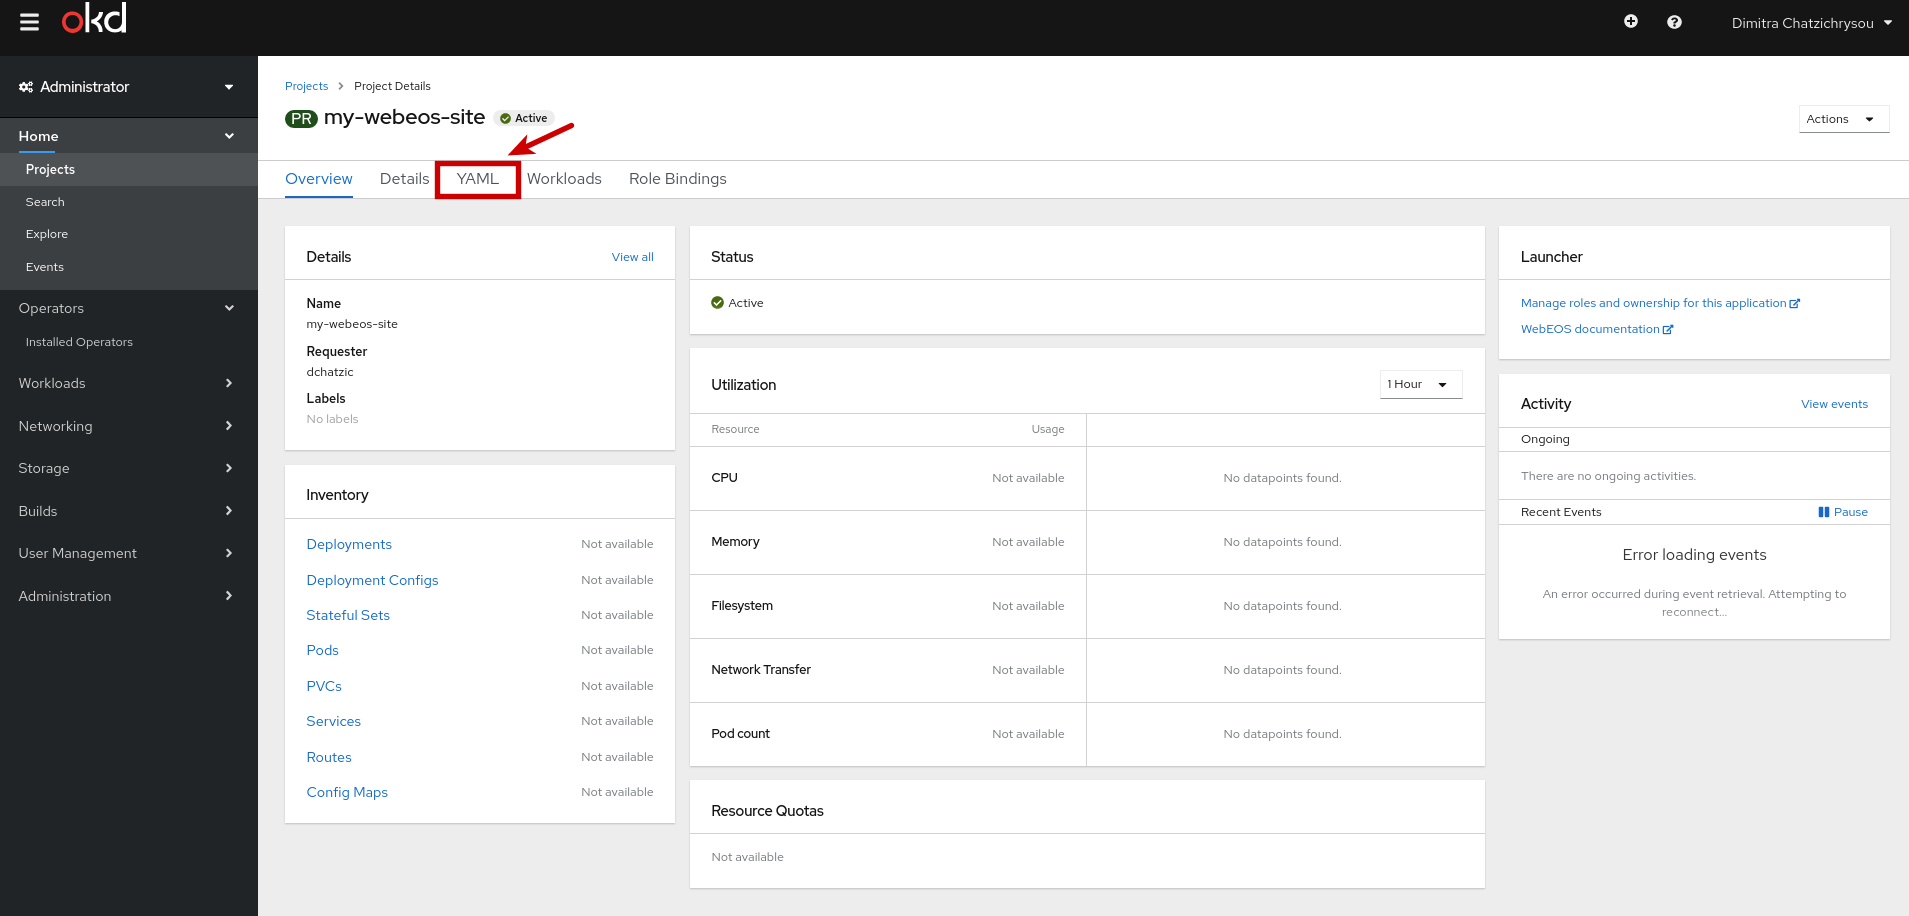
3. Click on YAML tab
4. Edit
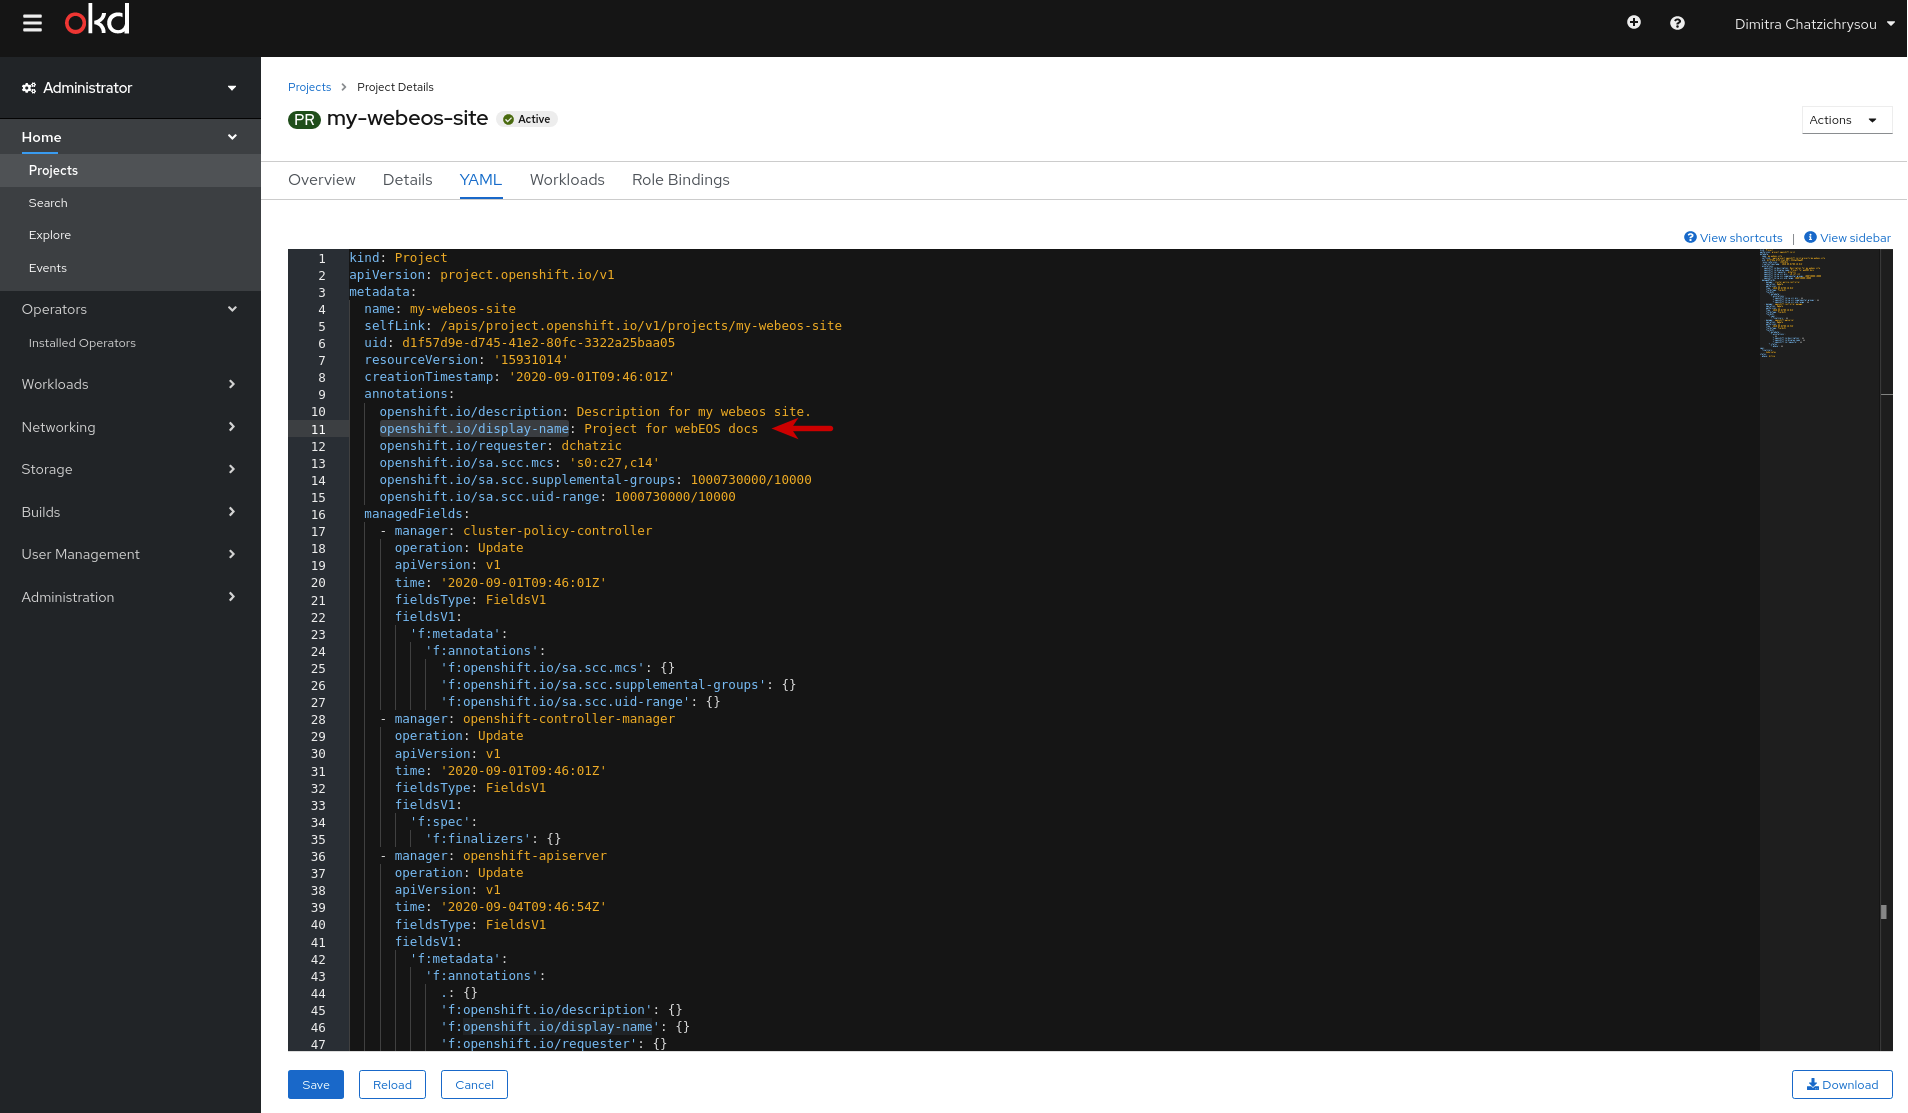
Change the Display Name
To change the display name of the site, edit the value of openshift.io/display-name:
5. Click on Save button

6. Click on Reload button
In order to see that the changes in YAML have been applied, click the Reload button.

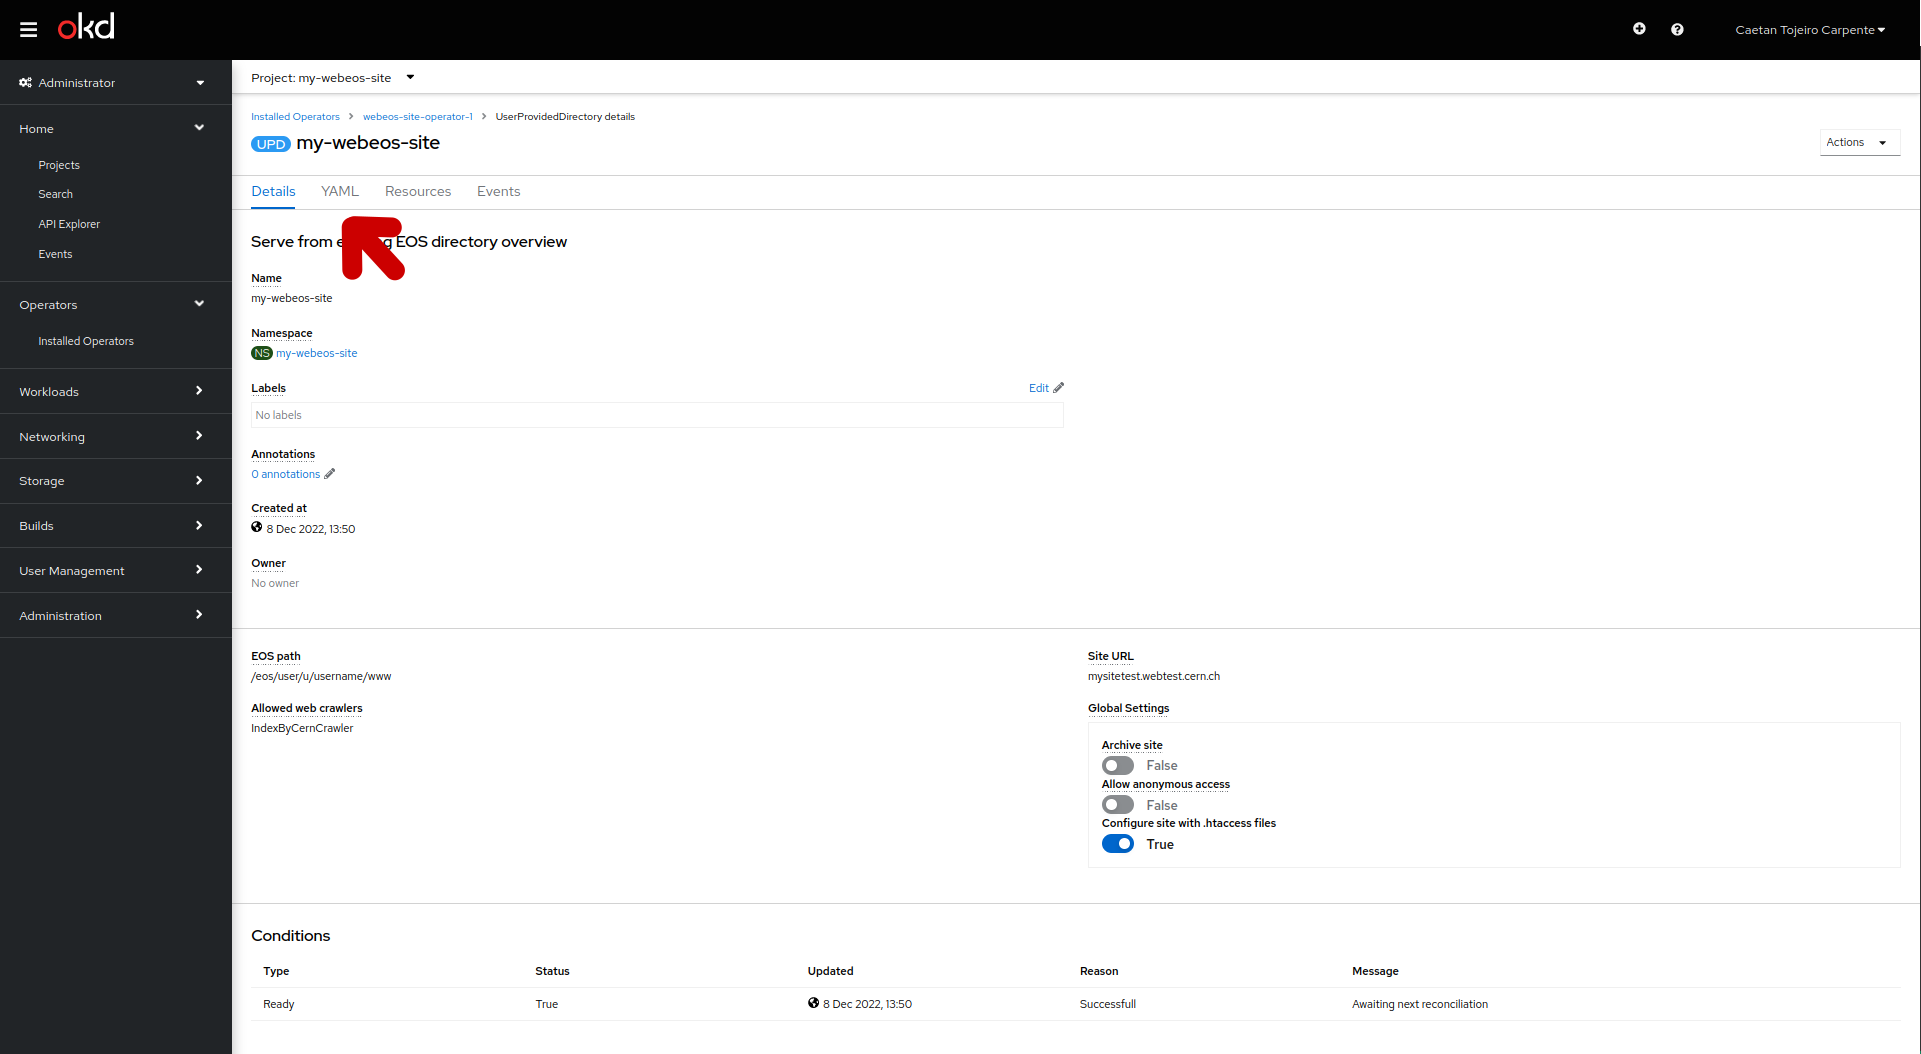
Editing the UserProvidedDirectory Details
The UserProvidedDirectory Details panel provides an overview of the settings necessary for serving content from an existing EOS directory. Follow these steps to access the panel:
1. Go to the OpenShift console page
2. Click on Projects on the left side menu
Choose the site you want to manage from a list of projects.
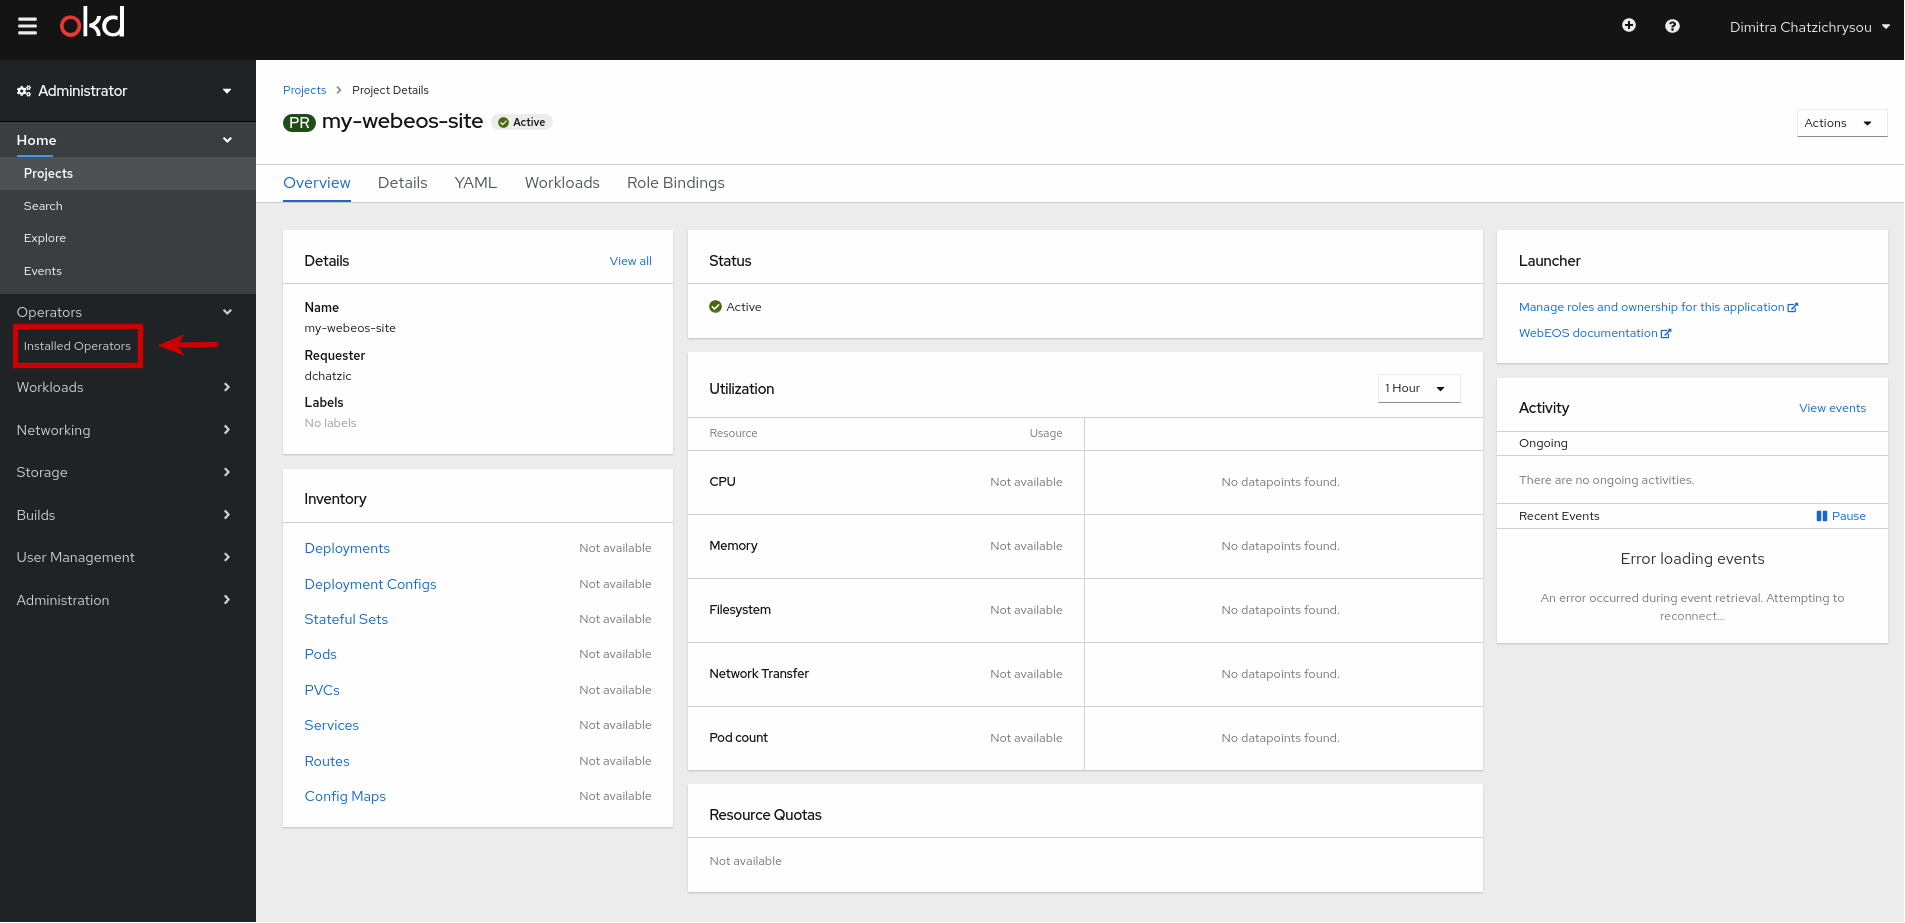
3. Click on Installed Operators on the left side menu
4. Click on Serve from existing EOS directory
5. Click on your UserProvidedDirectory.
Select Current namespace only radio button
Archive site
Sites that are not maintained anymore can be archived. Archived sites display a banner warning the users that the content might not be up to date. In addition, only authenticated users can access the site.
In case you want to archive your site, set the Archive site option to True and click Confirm change.
Authorization
Follow the Setting up authorization guide for more details on how to manage access to your site.
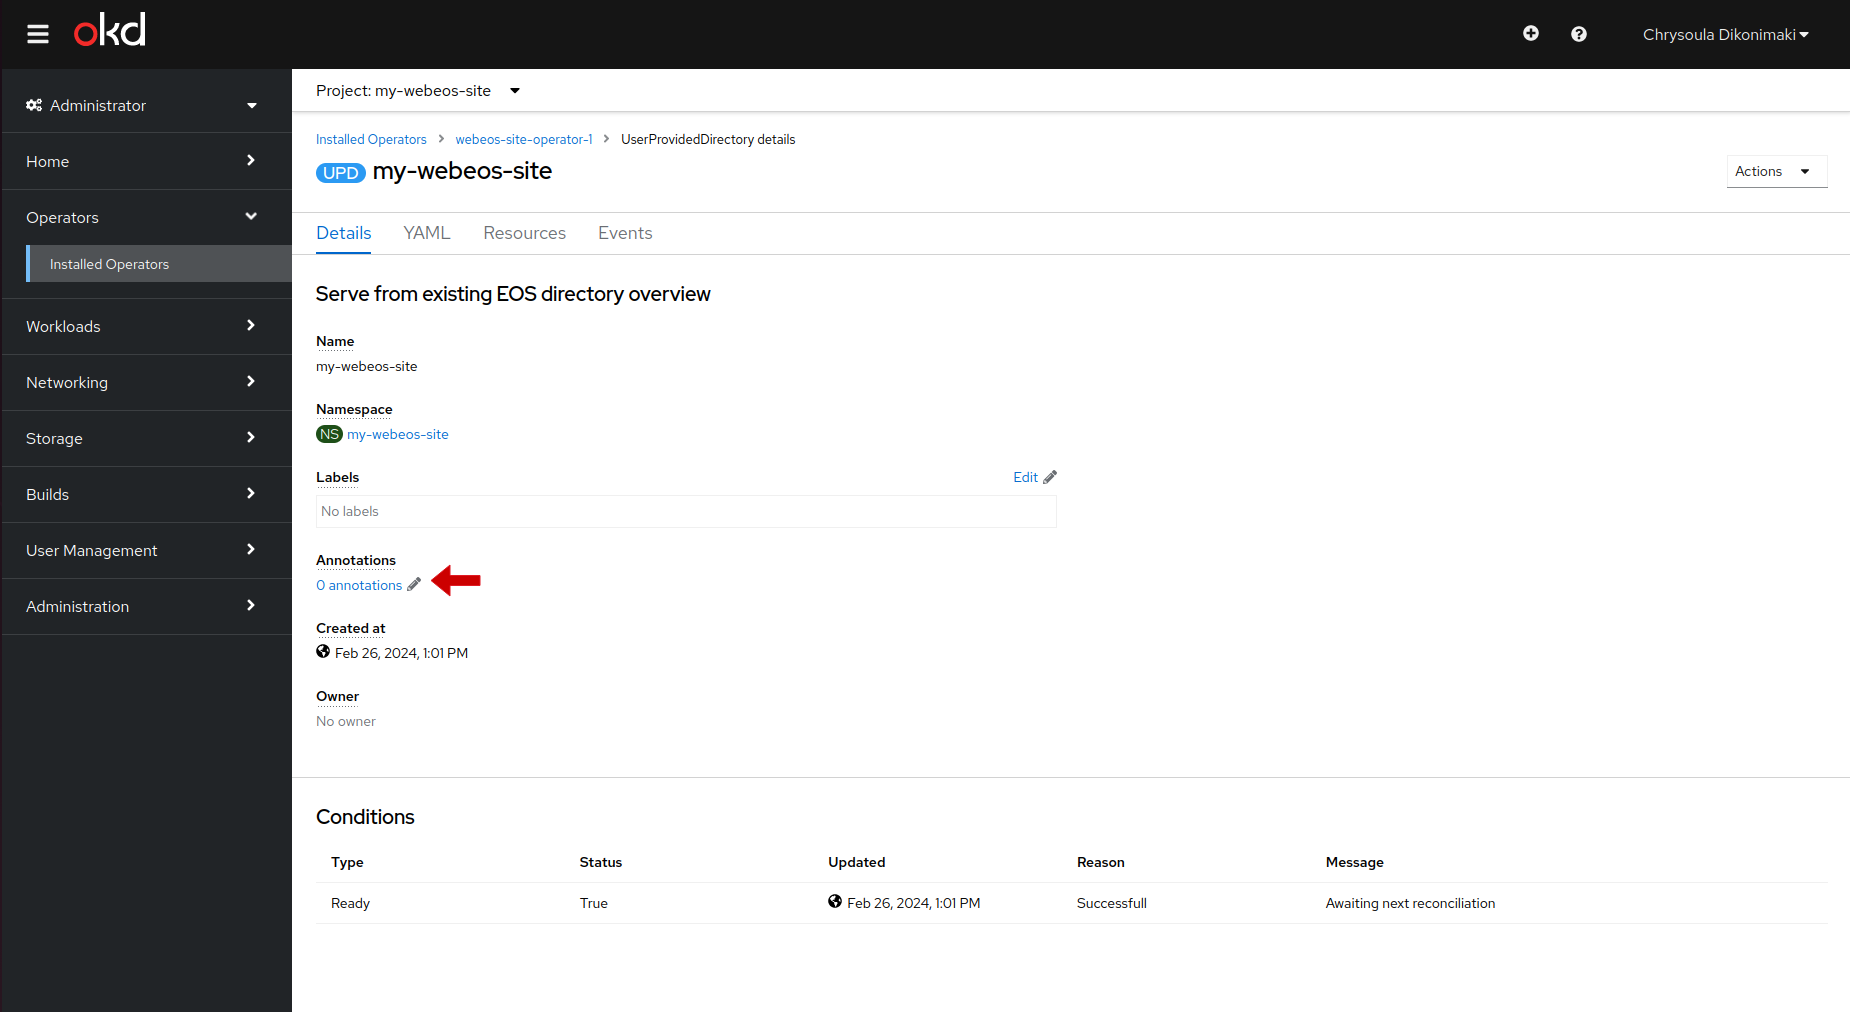
Edit annotations
Annotation can be edited in the UserProvidedDirectory by clicking the Annotations link or the black pencil icon:
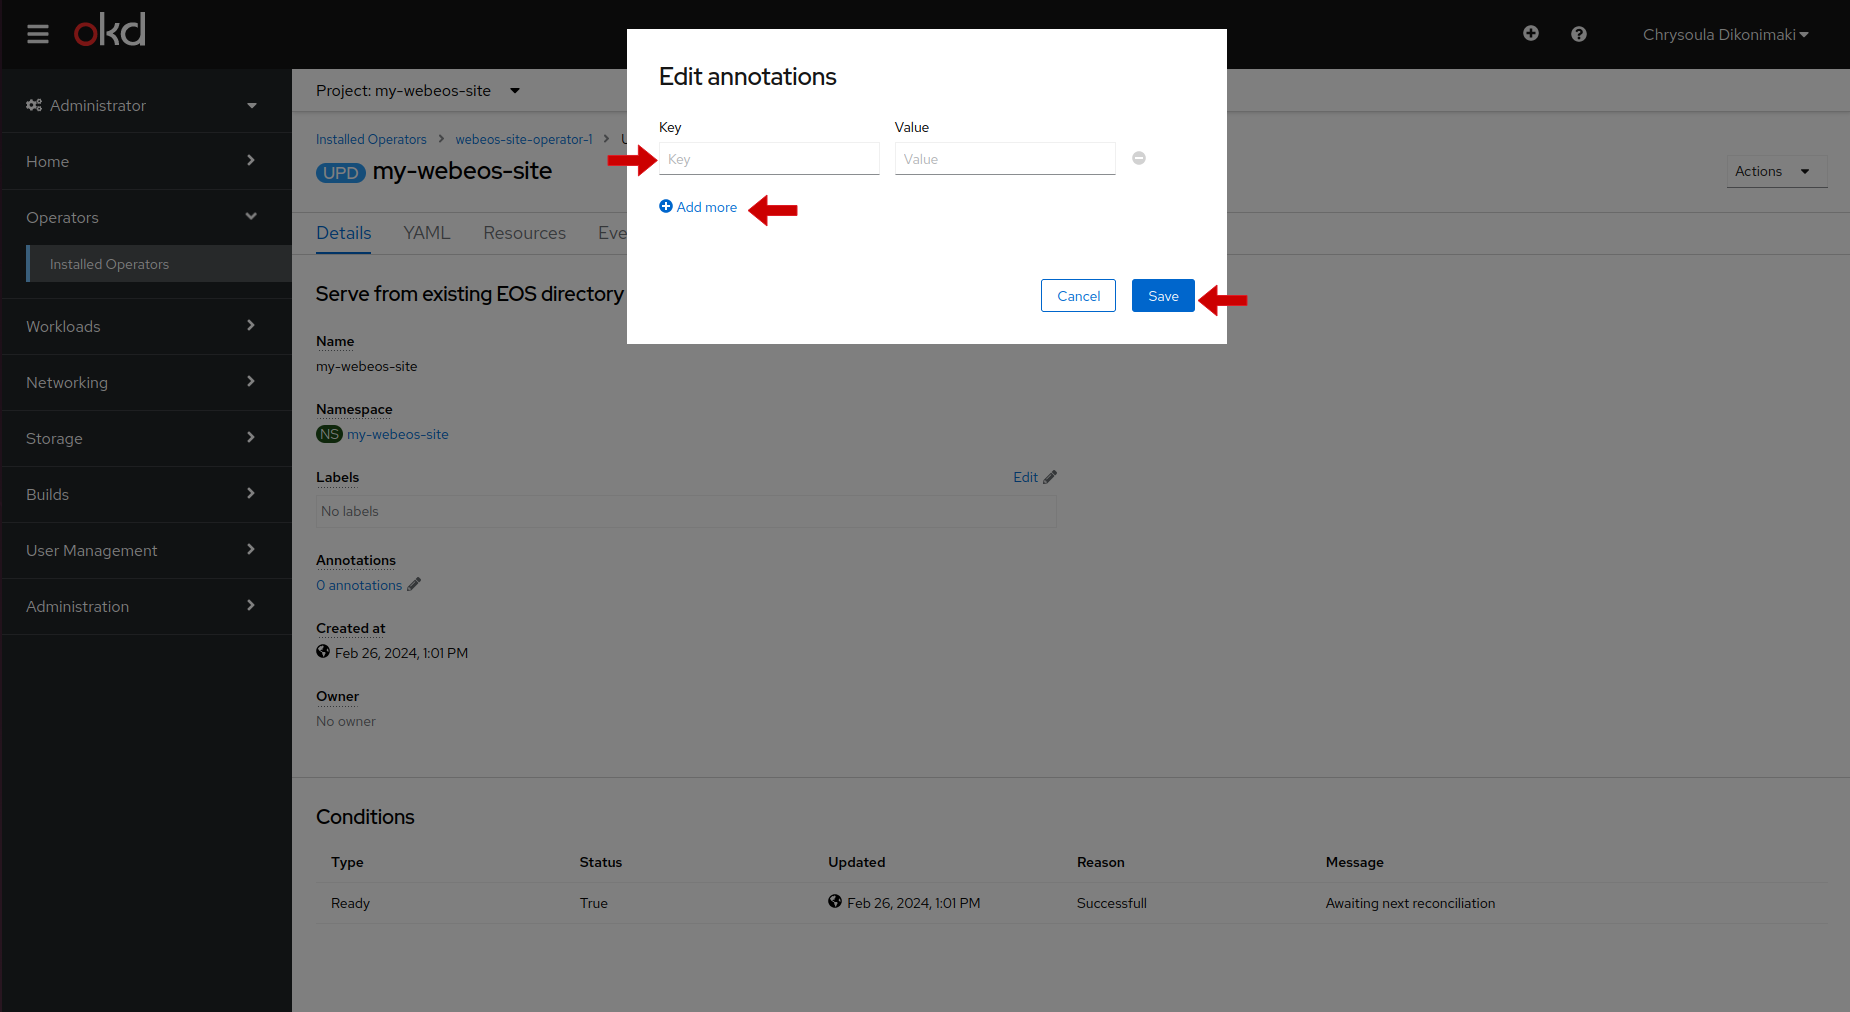
 The Edit Annotations form appears which let you view, edit, and remove existing annotations, and add new annotations.
Add an annotation by clicking the Add Annotation button, and fill in Key and Value fields. Click Save to save the new annotation.
Editing the UserProvidedDirectory's YAML
1. Click on YAML tab
2. Edit
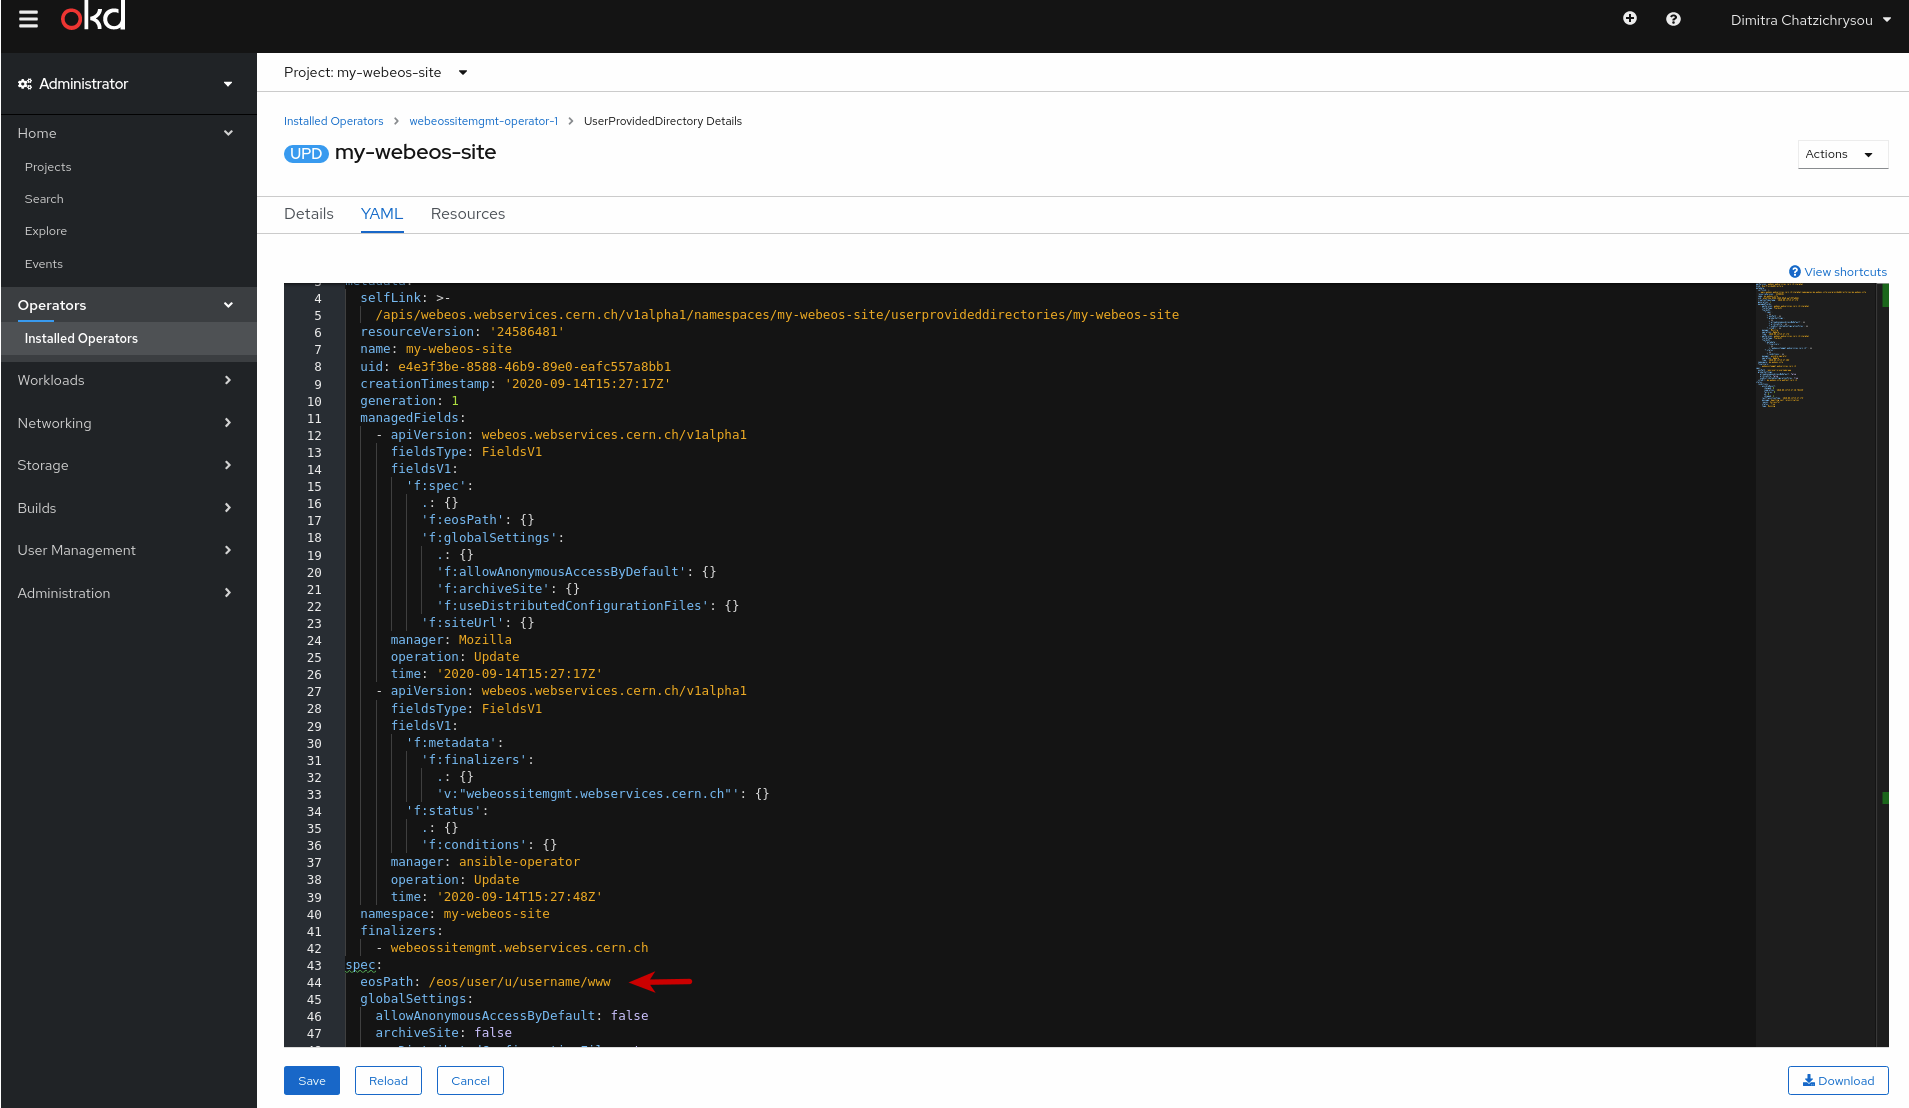
Change the EOS path
To change the EOS path used to serve the site's content, edit the value of eosPath:
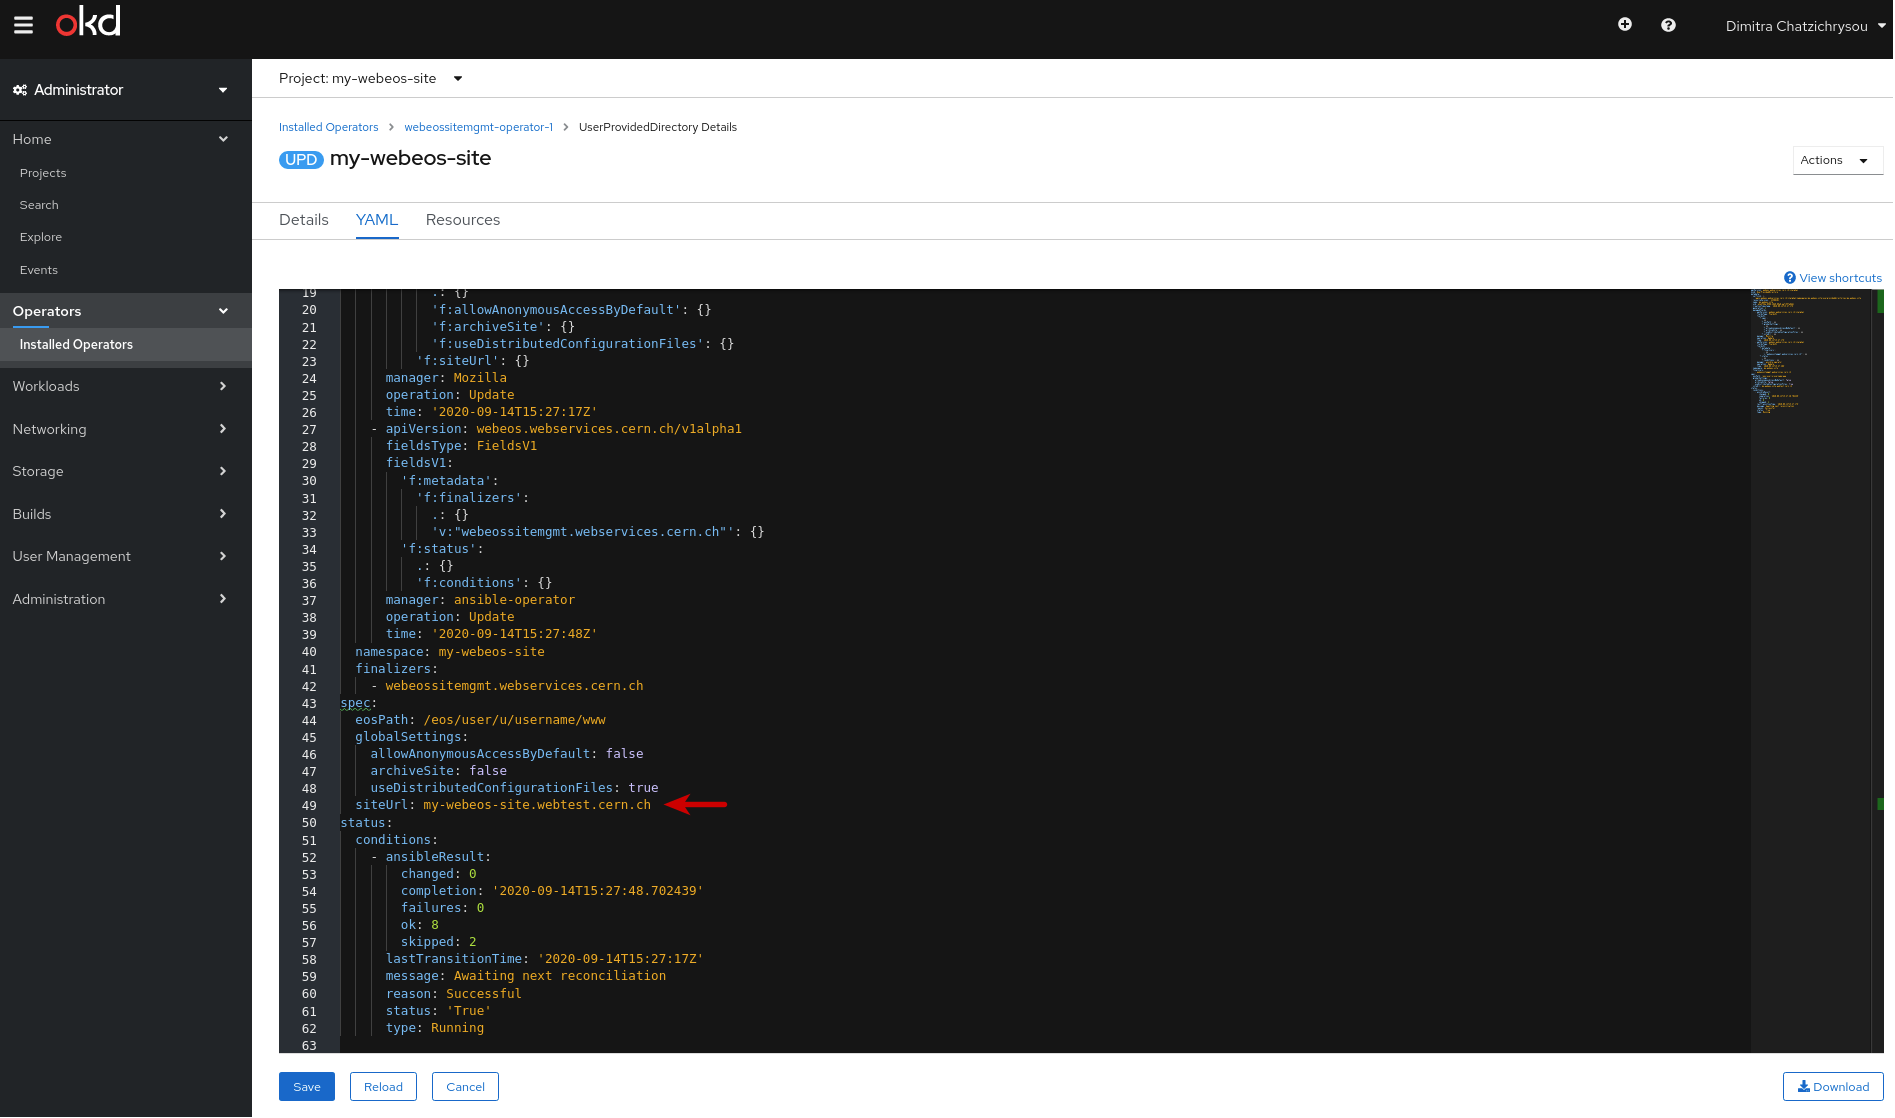
Change the Site URL
To change the site URL, edit the value of siteUrl. Keep in mind that the site URL has to look like mysite.web.cern.ch and can not be used already by another site.
Change between legacy and new URL
The new webEOS infrastructure supports a shorter version of site URL: https://sitename.web.cern.ch (notice the absence of sitename at the end of the URL).
Migrated sites are by default using the old URL format: https://sitename.web.cern.ch/sitename, therefore if you enter https://sitename.web.cern.ch, you get redirected to https://sitename.web.cern.ch/sitename. This is done to ease the testing of the website on the new infrastructure.
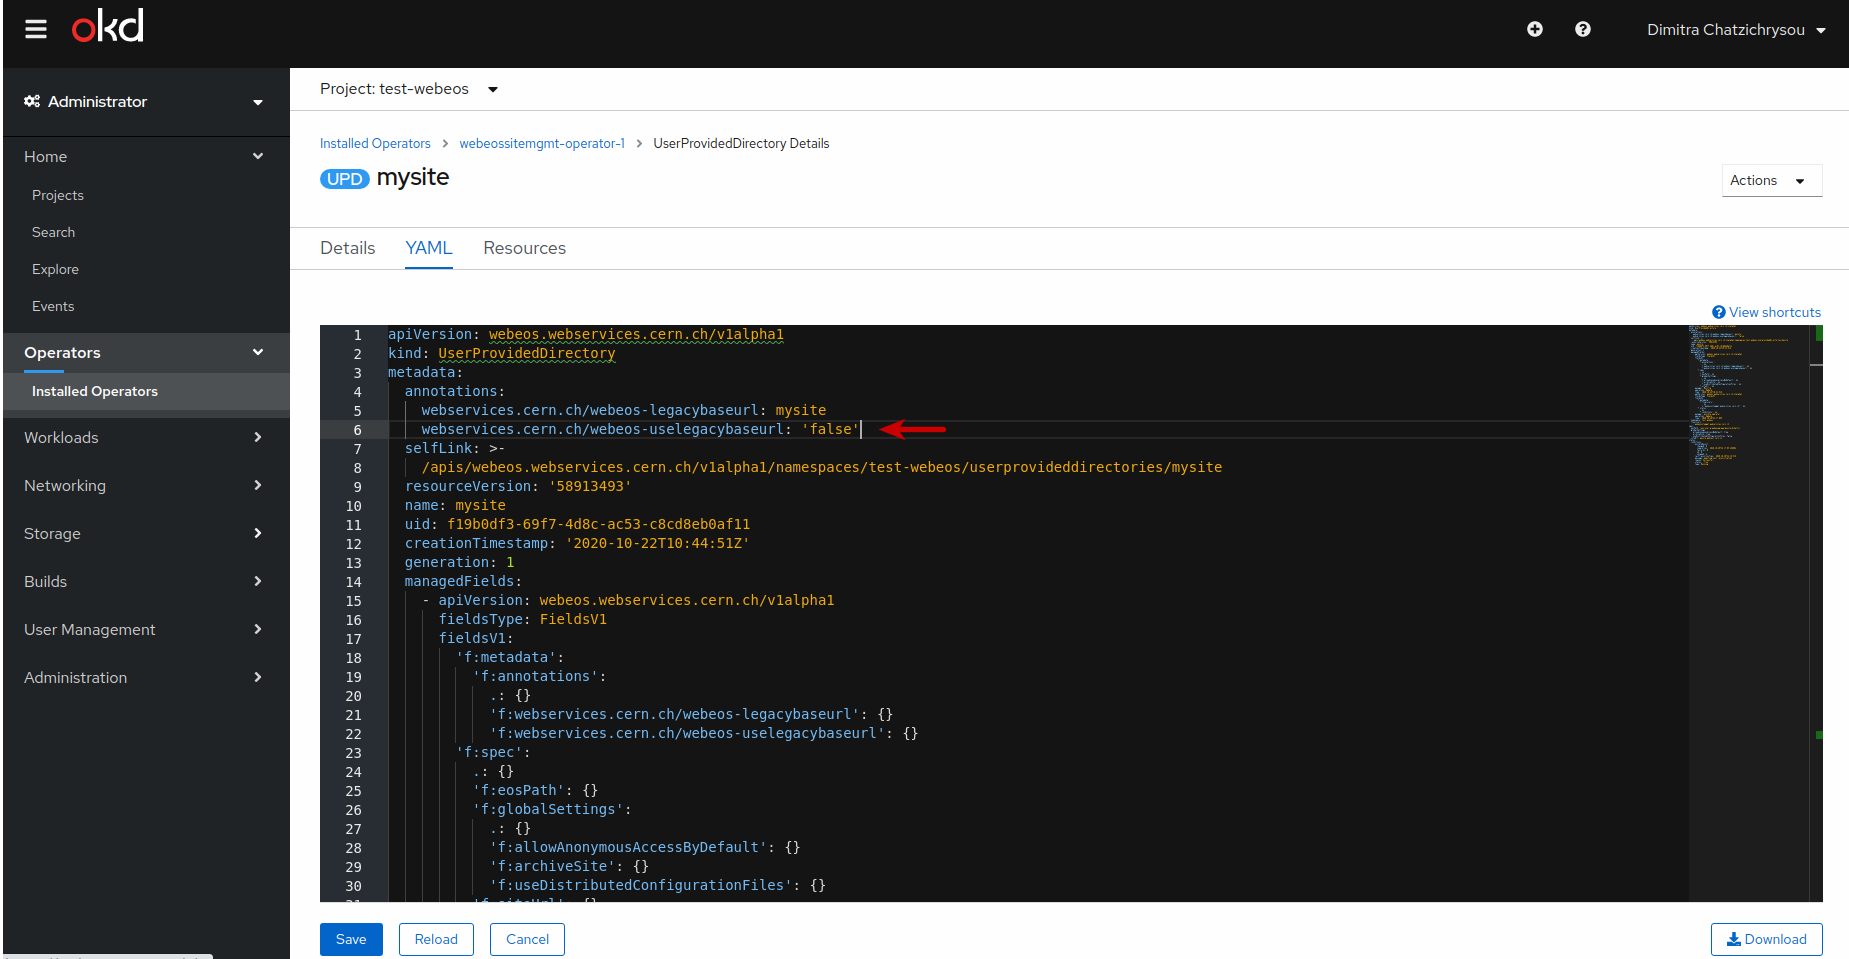
In case you wish that the site uses the new shorter format, edit the value of webservices.cern.ch/webeos-uselegacybaseurl and set it to 'false'.
This is also a recommended action to try in case the site doesn't work properly after the migration. It could be particularly valid for sites which rely on deriving physical paths of files to serve from the site root.
3. Click on Save button
Your site has been updated.
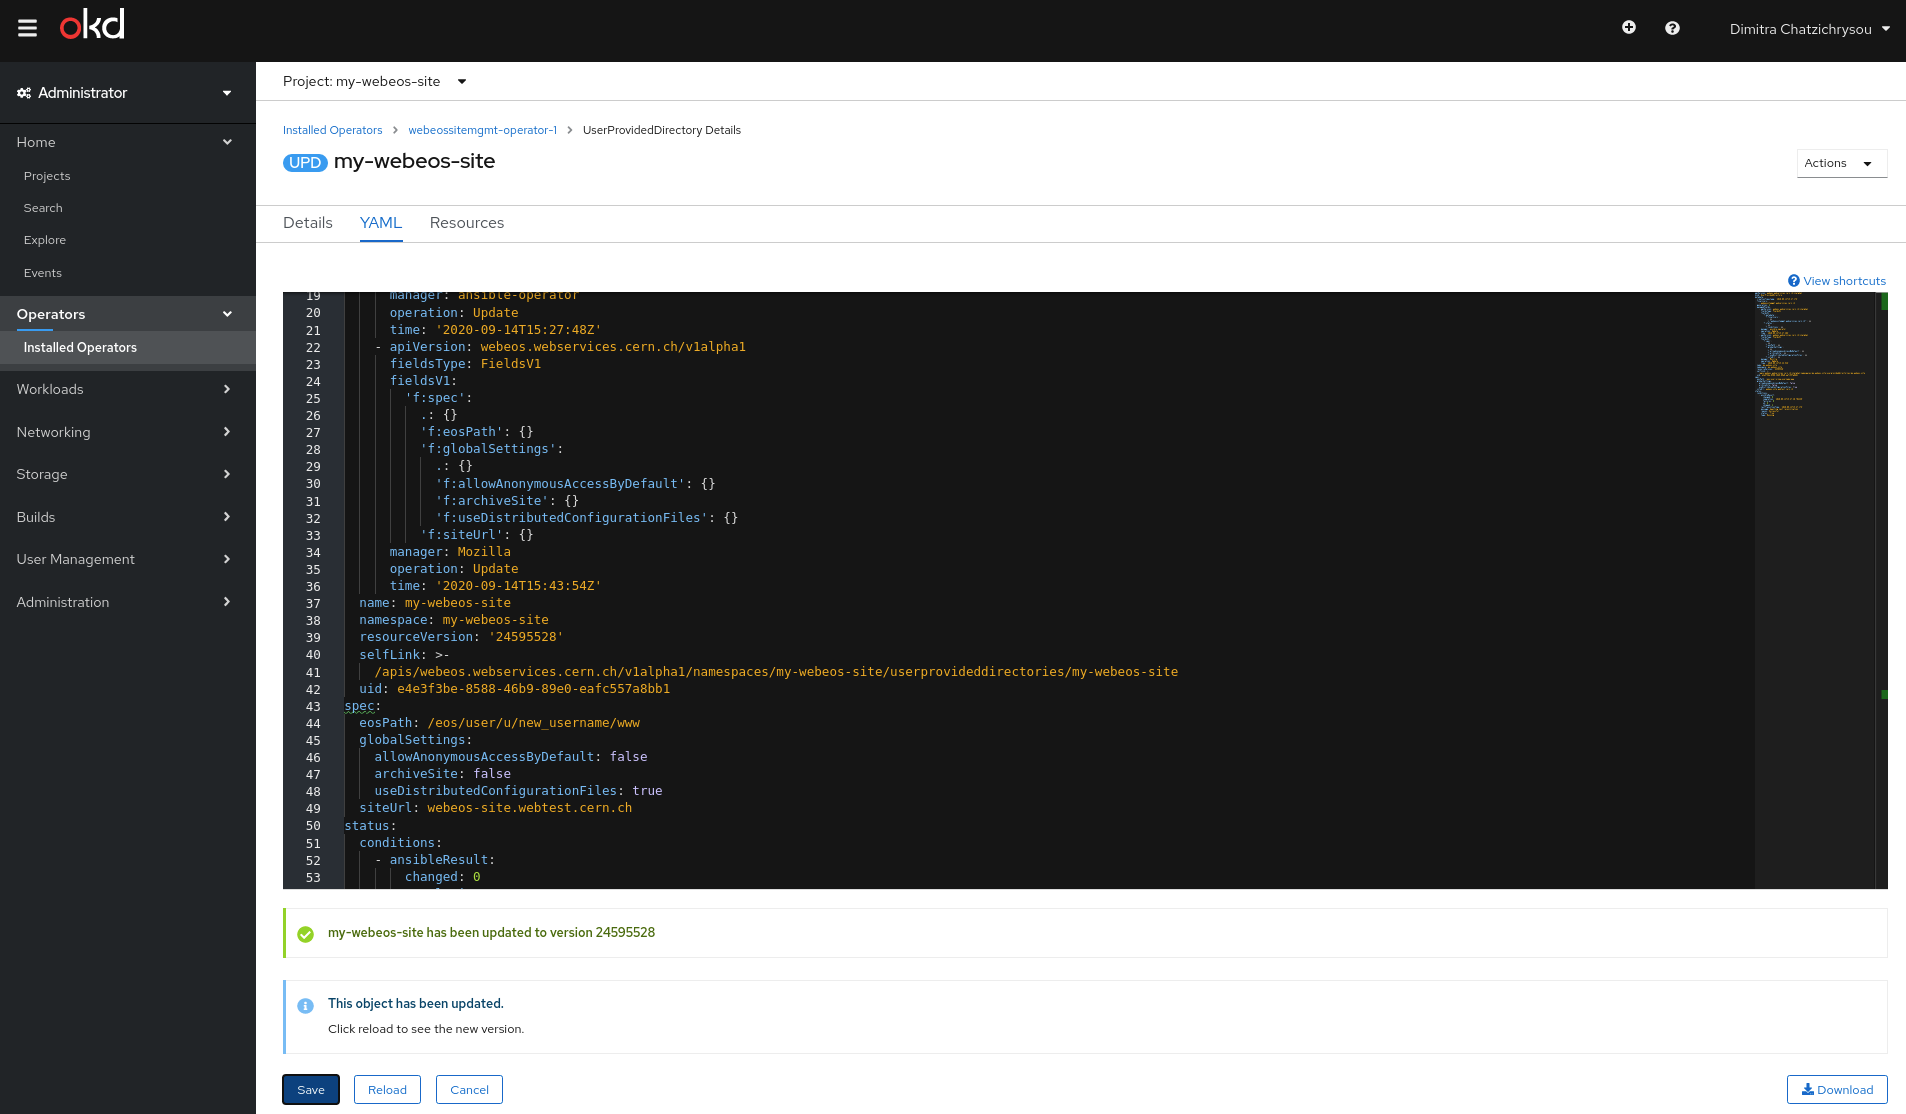
4. Click on Reload button
In order to see that the changes in YAML have been applied, click the Reload button.
Using .htaccess files
An .htaccess file is a directory-level configuration file supported by Apache HTTP Server, allowing for advanced configuration of a site, such as establishing more granular (per directory) access control, URL rewrite, directory browsing, cgi execution and others. Any folder below the site's root path (such as /eos/user/j/johnny/www) can have an .htaccess file, however it's advisable to use this mechanism with care as it has some negative impact on site's load time.
Important: In order to use .htaccess files, the setting Configure site with .htaccess files must be set to true in UserProvidedDirectory Details panel.

Deleting a webEOS site
You can delete a webEOS site by following a few simple steps. Notice that the deletion concerns only the site configuration in the hosting system, therefore the web site's content (stored on EOS) will not be impacted.
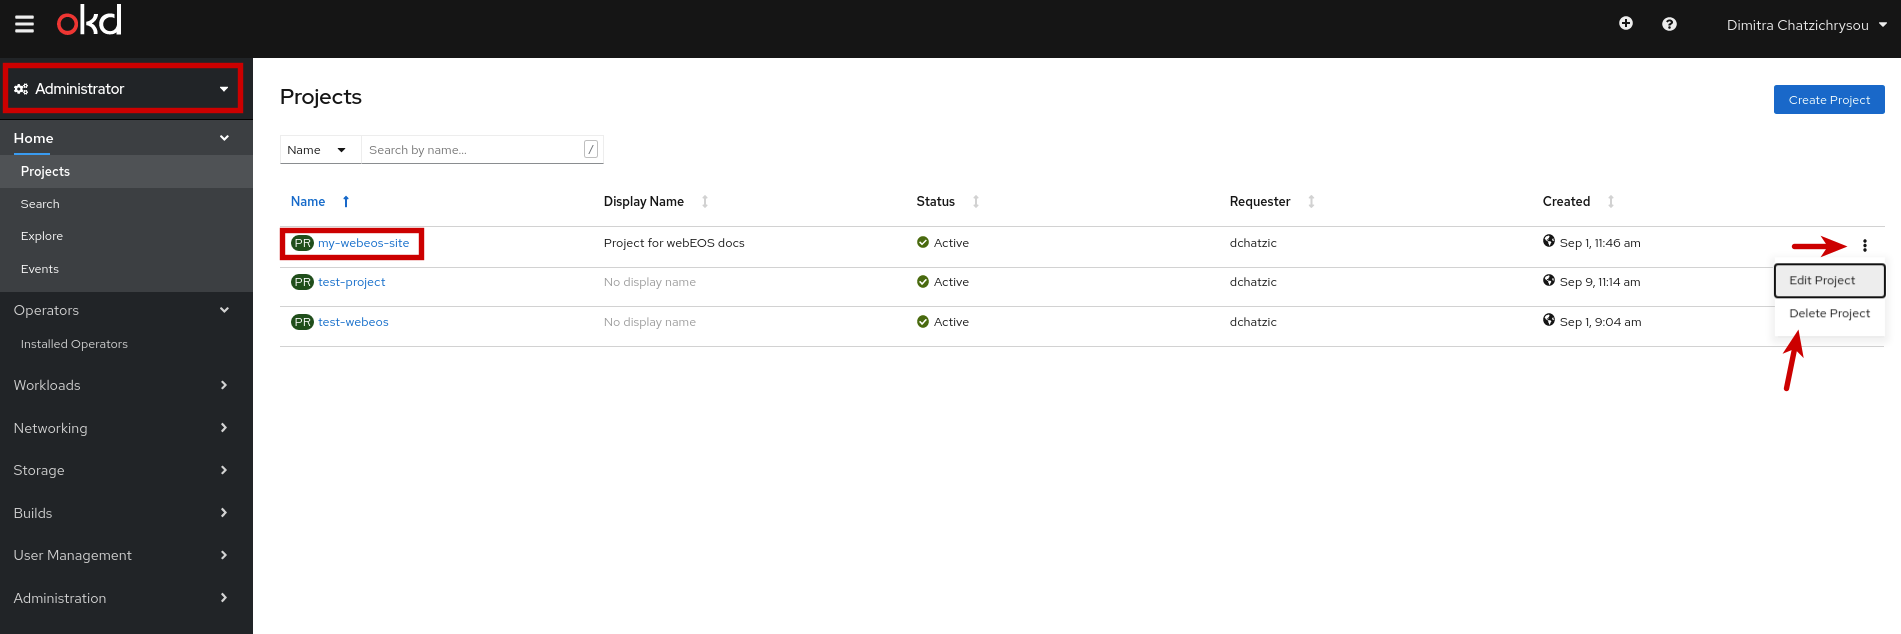
1. Go to the OpenShift console page
Check on the left side menu that the Administrator option is selected (and not Developer).
2. Click on the three dots on the right of the project that you want to delete and then choose Delete Project
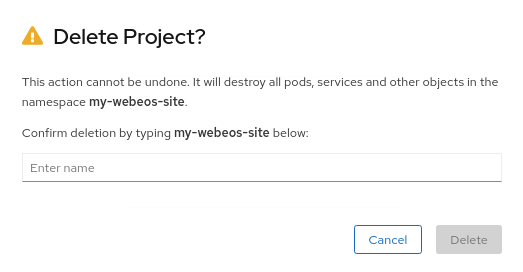
3. Confirm deletion by typing the name of the project
4. Click on Delete button
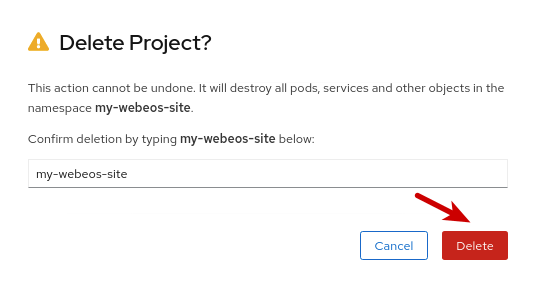
Your webEOs site has been deleted.